The lens is not stopped down to the current aperture when the depth-of-field preview button is pressed (EOS 7D Mark II)
Solution
The lens will not be stopped down to the aperture you selected when another function is assigned to the depth-of-field preview button, or if it is set to [OFF]. In this case, it will not be possible to check the depth of filed by pressing the button.
The procedure for confirming the setting is explained below.
1. Set the camera's power switch to <ON>.
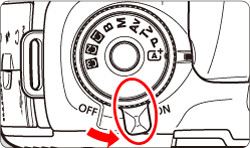
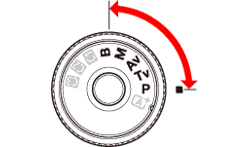
2. Set the Mode Dial to < P / Tv / Av / M / B>.
3. Press the <MENU> button to display the menu screen.
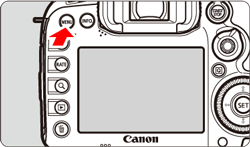
4. Press the < > button and select the [
  ] tab.
 > button and select the [
  ] tab.
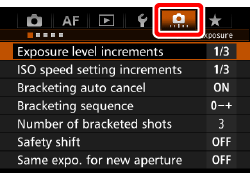
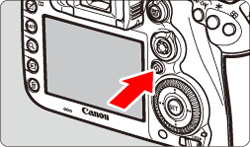
5. Turn the < > dial and select the [
  ] tab.
 > dial and select the [
  ] tab.

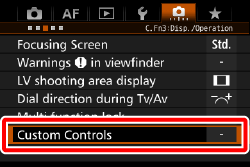
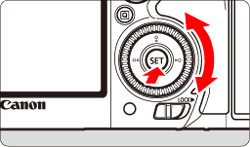
6. Turn the < > dial to select [Custom Controls], then press <
 >.
>.
 > dial to select [Custom Controls], then press <
 >.
>.
7. The currently assigned function will be shown next to the button’s icon.
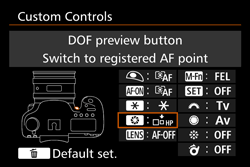
When another function is assigned to the depth-of-field preview button, or if it is set to [OFF], please refer to the procedure explained below.
1. Turn the < > dial to select [depth-of-field preview button], then press <
 >.
>.
 > dial to select [depth-of-field preview button], then press <
 >.
>.
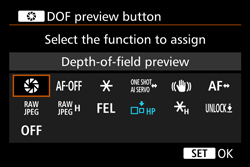
2. Turn the < > dial to select [depth-of-field preview ], then press <
 >.
>.
 > dial to select [depth-of-field preview ], then press <
 >.
>.
NOTE
You can press the < > button to revert the Custom Control settings to their defaults.
 > button to revert the Custom Control settings to their defaults.
Note that the [  : Custom Controls] settings will not be canceled even if you select [
  : Clear all Custom Func. (C.Fn)].
 : Custom Controls] settings will not be canceled even if you select [
  : Clear all Custom Func. (C.Fn)].
3. Press the depth-of-field preview button to check the depth of field.
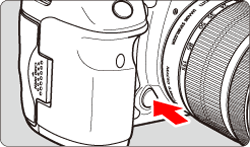
You can press the depth-of-field preview button to stop down the lens to the current aperture setting and check the depth of field (range of acceptable focus).
NOTE
- If the settings cannot be returned to normal by following the procedure above, please contact a Canon Customer Service Center.
- A higher f/number will make more of the foreground and background fall within acceptable focus. However, the viewfinder will look darker.
- While looking at the Live View image, you can change the aperture and press the depth-of-field preview button to see how the depth of field changes.
- The exposure will be locked (AE lock) while the depth-of-field preview button is pressed.
REFERENCE
For more information on assigning custom control functions, please refer to the links in the related information section below.


