Solution
This page describes how to shoot movies with the default settings.
For details on how to change settings to shoot movies, please refer to the Related Information.
IMPORTANT
When shooting movies, use a large-capacity SD card rated SD Speed Class 6 "

" or higher. If you use a slow-writing card when shooting movies, the movie might not be recorded properly. And if you playback a movie on a card having a slow reading speed, the movie might not playback properly.
2. Set the power switch to <ON>.
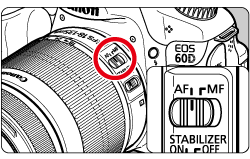
3. Set the lens focus mode switch to <AF>.
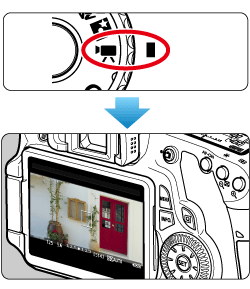
4. Set the Mode Dial to <

>.
The reflex mirror will make a sound, then the image will appear on the LCD monitor.
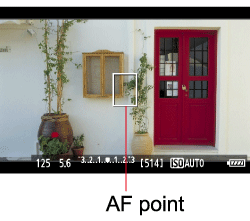
5. The AF point will appear. Press the <Multi-controller> to move the AF point to where you want to focus.
- It cannot go to the edges of the picture.
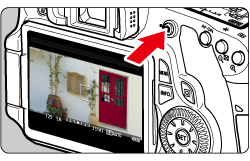
- To return the AF point to the center, press the <
 > button.
6. Aim the AF point over the subject and press the shutter button halfway.
7. Press the <

> (Movie shooting) button to start shooting a movie.
While the movie is being shot, the "

" mark will be displayed on the upper right of the screen.
8. To stop movie shooting, press <

> again.
CAUTION
During movie shooting, do not point the lens toward the sun. The sun's heat can damage the camera's internal components.
NOTE
Recording and Image Quality
- The movie file format will be MOV.
- Due to file system limitations, if the file size of a single movie clip reaches 4 GB, movie shooting will stop automatically. At [1920x1080] and [1280x720], the maximum recording time of a single movie clip will be approx. 12 min. At [640x480] and [Crop 640x480], the maximum recording time of a single movie clip will be approx. 24 min. To shoot a movie again, press the <
 > button. (A new movie file starts being recorded.) An increase of the camera’s internal temperature may cause movie shooting to stop before the maximum recording time shown above.
- The camera’s built-in microphone will also pick up camera operation noise. If you use a commercially-available external microphone, you can prevent (or reduce) these noises from being recorded.
Playback and TV connection
- If you connect the camera to a TV set with an HDMI cable and shoot a movie in [1920x1080] or [1280x720], the movie being shot will be displayed at a small size on the TV. However, the actual movie will be properly recorded at the movie recording size that was set.
- If you connect the camera to a TV set and shoot a movie, the TV will not output any sound during the shooting. However, the sound will be properly recorded.
IMPORTANT
- If the camera's internal temperature becomes high, the [
 ] icon may appear on the screen. When not shooting, turn off the camera.
- If you take still photos while the [
 ] icon is displayed on the screen, the image quality may be degraded. The image quality of movies is not affected.
- If the [
 ] icon is displayed and you keep shooting movies until the camera's internal temperature rises further, the movie shooting will stop automatically. If this happens, you will not be able to shoot again until the camera's internal temperature decreases. Turn off the power and let the camera rest for a while.
 " or higher. If you use a slow-writing card when shooting movies, the movie might not be recorded properly. And if you playback a movie on a card having a slow reading speed, the movie might not playback properly.
 >.
>.
 > button.

 > (Movie shooting) button to start shooting a movie.
 " mark will be displayed on the upper right of the screen.
 > again.
 > button. (A new movie file starts being recorded.) An increase of the camera’s internal temperature may cause movie shooting to stop before the maximum recording time shown above.
 ] icon may appear on the screen. When not shooting, turn off the camera.
  ] icon is displayed on the screen, the image quality may be degraded. The image quality of movies is not affected.
  ] icon is displayed and you keep shooting movies until the camera's internal temperature rises further, the movie shooting will stop automatically. If this happens, you will not be able to shoot again until the camera's internal temperature decreases. Turn off the power and let the camera rest for a while.