03-Aug-2018
8204068300
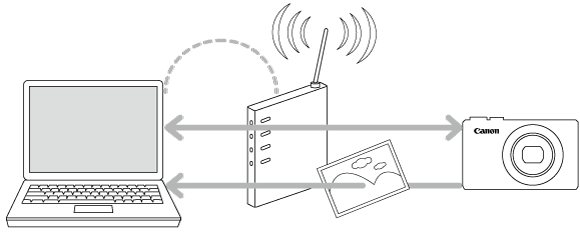
 icon, and camera setting procedures are indicated by the
  icon.
icon. 1. Download the software [ Image Transfer Utility 2 ] from the Canon homepage on to your computer, and proceed to installation.
  2. Once the installation is complete, the settings window for [ Image Transfer Utility 2 ] will be displayed, click [ Next ] .
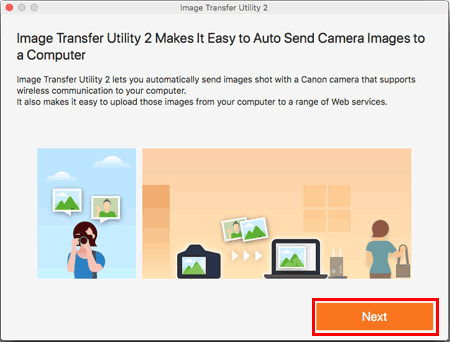
 3. [ Preparation ] will be displayed, read the details carefully and click [ Next ] .
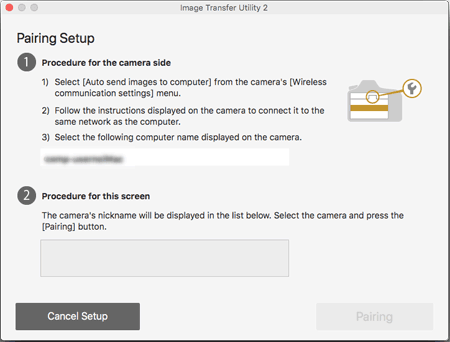
 4. [ Pairing Setup ] will be displayed. Keep the screen as it is displayed, and move on to the next step.
 1. Press the
  button.
 2. When the [ Nickname ] screen appears, press the
  button.
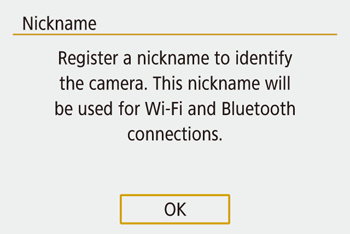

 3. Confirm the Nickname (Name of the camera). After confirmation, press the
  button.
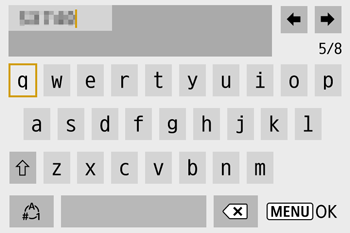
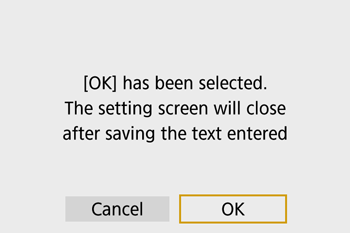
 4. Press the
  /
/  buttons to choose [ OK ] , press the
  button.

 5. Press the
  button.
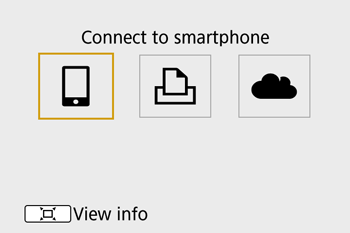
 6. Press the
  /
/  buttons to choose [
  ] , press the
  button.
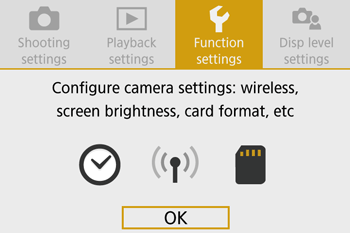
 7. Press the
  /
/  buttons to choose [
  1 ] .
1 ] .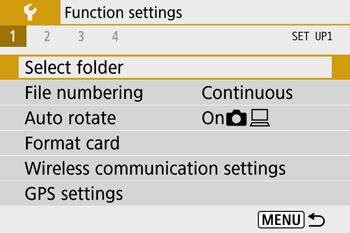
 8. Press the
  /
/  buttons to choose [ Wireless communication settings ] , press the
  button.
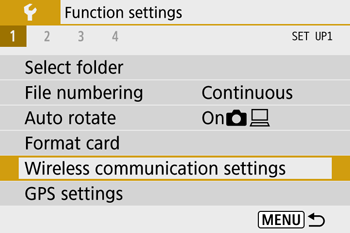

 9. Press the
  /
/  buttons to choose [ Wi-Fi settings ] , press the
  button.
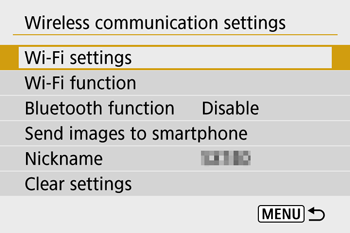
 10. Press the
  /
/  buttons to choose [ Auto send images to computer ] , press the
  button.
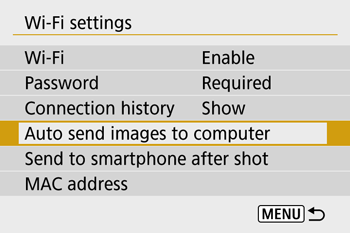
 11. Press the
  /
/  buttons to choose [ Auto send ] , press the
  button.
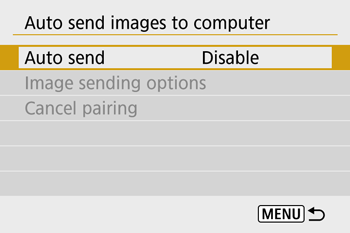
 12. Press the
  /
/  buttons to choose [ Enable ] , press the
  button.
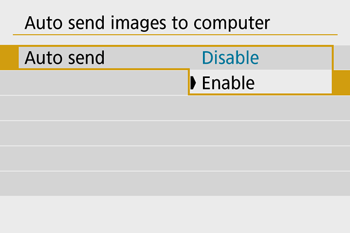
 13. Press the
  /
/  buttons to choose [ OK ] , press the
  button.
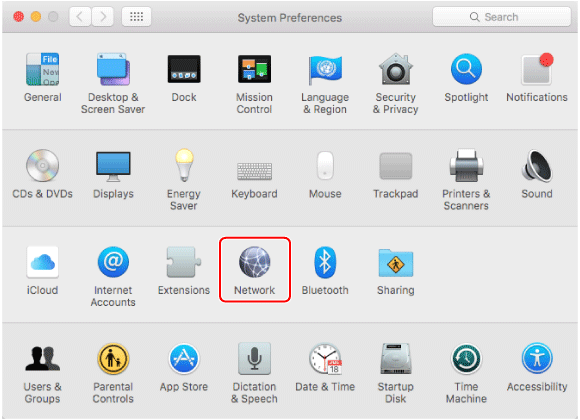
 14. Click the [System Preferences] icon in the dock.
 15. Click the [Network] icon.
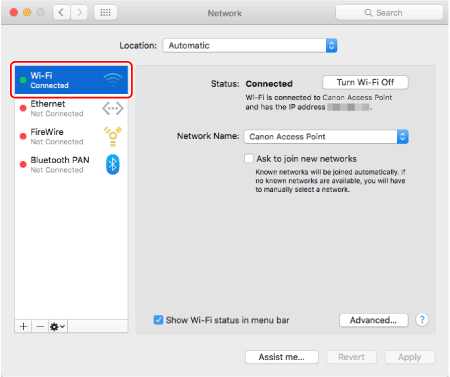
 16. Click [Wi-Fi].
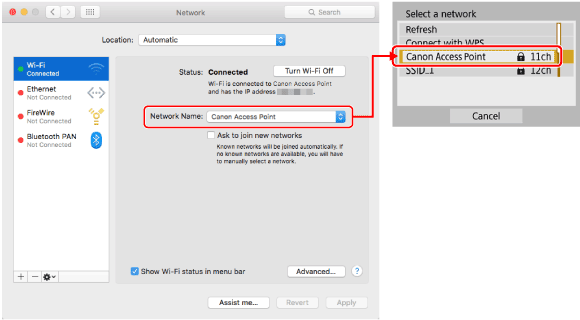
 17. Select the network that matches with the one displayed in the [Network Name] field, and then press the
  button. (See the network example below).
 18. Double-click the hard disk icon.
 19. Double-click [Applications].
 20. Double-click [Utilities].
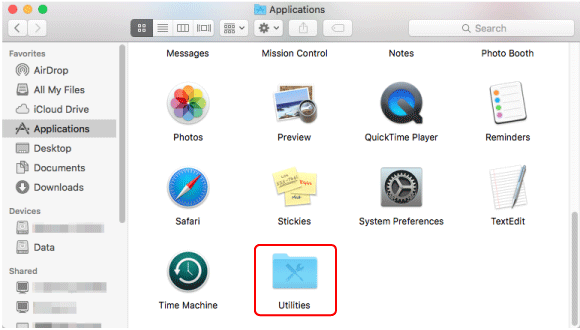
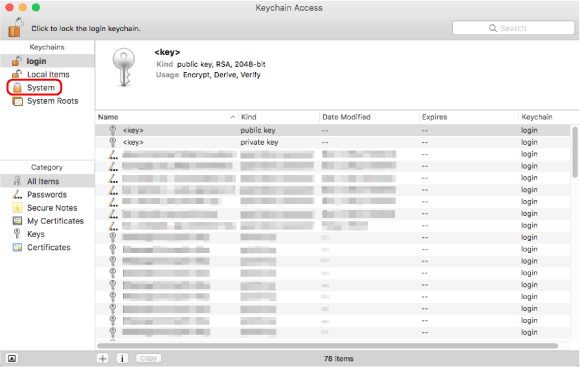
 21. Double-click [Keychain Access].
 22. Select [System] from the [Keychains] list.
 23. Select [Passwords] from the [Category] list.
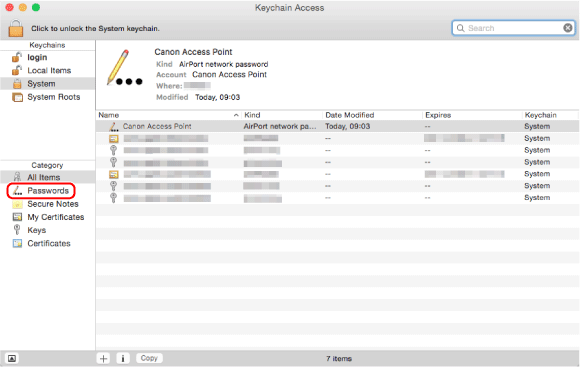
 24. Double-click on the network that matches with [Network Name] on the [Network] screen.
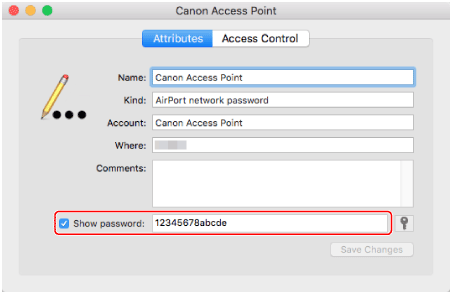
 25. Check the [Show password] box.
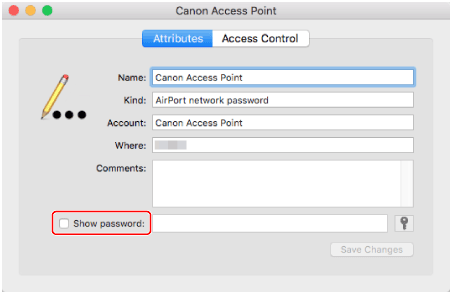
 26. Enter the password that you use to log in to your Macintosh.
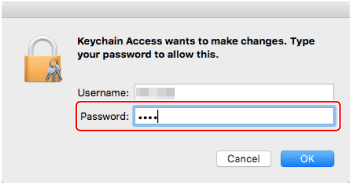
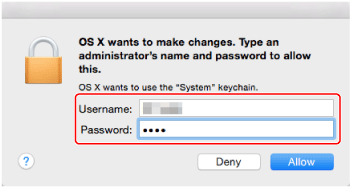
 27. When the screen below appears, enter the username and password used to log in to Macintosh.
 28. The access point password is displayed. (See the password example below).
 29. On the [ Password ] screen, press the
  button.
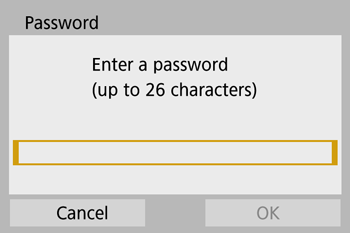
 30. Enter the password displayed in the [Show password] field.
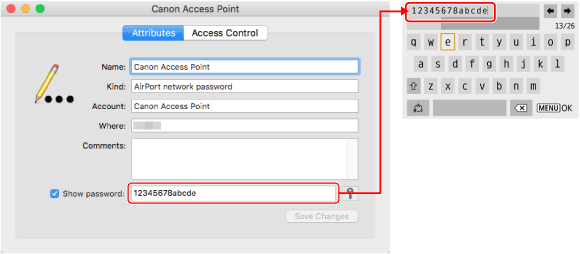
 button after the letters have been confirmed, before returning to the previous screen.
 31. After the password has been entered, press the
  /
/  buttons to choose [ OK ] , press the
  button.
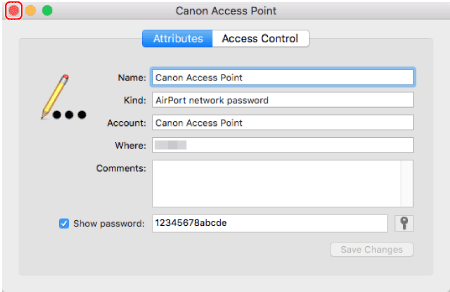
 32. Click [
  ] to close the window.
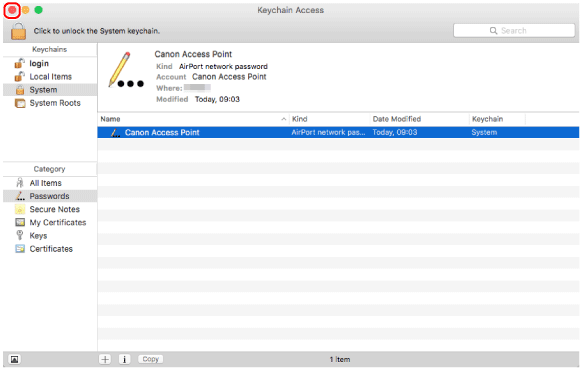
 33. Click [
  ] to close [Keychain Access].
 34. Click [
  ] to close [Utilities].
 35. Click [
  ] to close [Network].
 36. Press the
  /
/  buttons to choose Key index, press the
  button. (This screen may or may not be displayed)
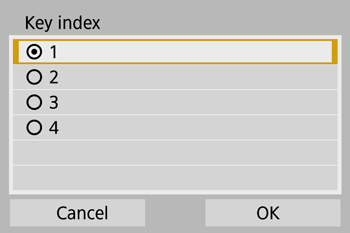
 /
/  buttons to choose [ OK ] , press the
  button to go to the next step.
 37. Press the
  /
/  buttons to choose [ Auto setting ] , press the
  button.
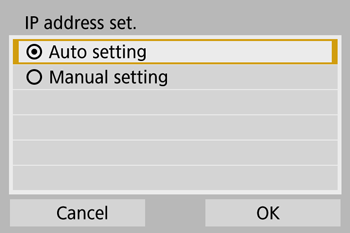
 /
/  buttons to choose [ OK ] , press the
  button to go to the next step.
 38. The computer name will appear. Confirm that the name displayed on the [ Pairing Setup ] screen is the same, press the
  button.
 39. If the camera Nickname is displayed under [ Procedure for this screen ] , select camera and click on [ Pairing ].
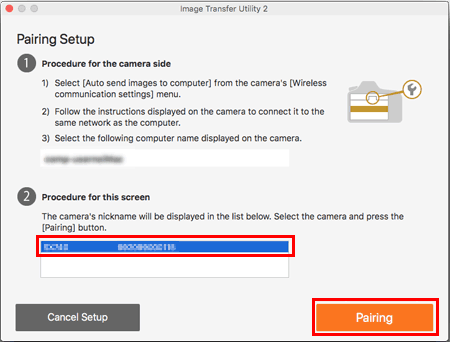
 40. Once pairing is complete, the [ Setup Complete ] window will appear, click [ OK ] .
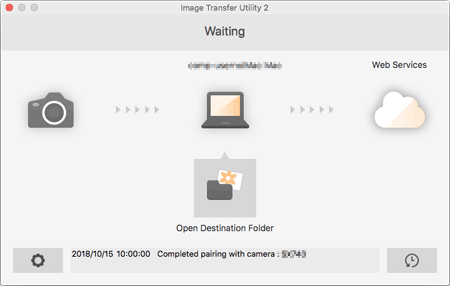
 41. The [ Waiting ] window will appear for Image Transfer Utility 2. To continue transfering images from the camera, stay on this screen and wait.
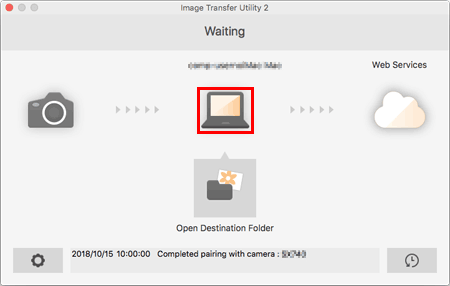
 1. Choose [
  ] menu > [Wireless communication settings] > [Wi-Fi settings] > [Auto send images to computer].
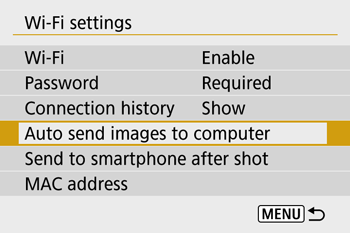
 2. Choose [ Image sending options ] .
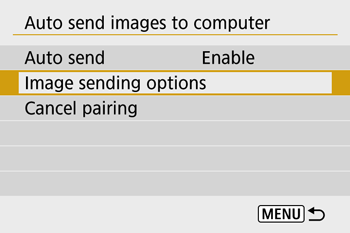
 3. In [Image sending options], specify the transfer conditions.
 4. Make sure the camera is off.
 1. Confirm that the Image Transfer Utility 2 window shows [ Waiting ] .
 2. The images will automatically transfer to the computer once the camera has been turned on within range of the access point.
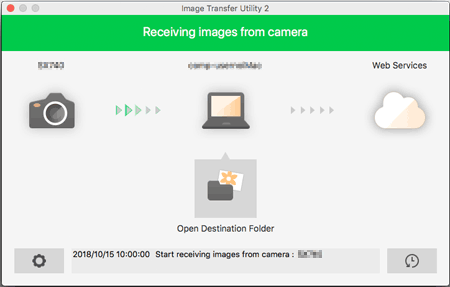
 3. To confirm the transferred images, click [ Open Destination Folder ] .
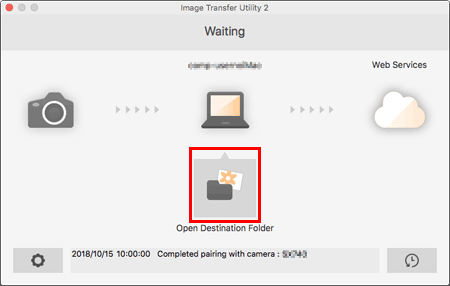
 of the Image Transfer Utility 2 screen, choose [ Quit ] , this will disable auto-transfer even when the camera is turned on. To Enable wireless transfer again, turn on Image Transfer Utility 2.
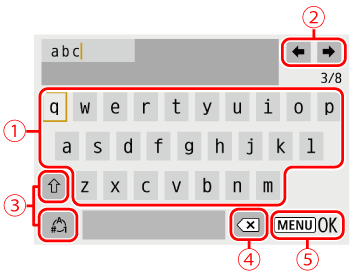
 | • Entering characters Press the  / /  / /  / /  buttons or turn the buttons or turn the  dial to choose the key of your desired character, and then press the dial to choose the key of your desired character, and then press the  button. button. |
 | •Moving the cursor Choose [  ] or [ ] or [  ] and press the ] and press the  button. button. |
 | •Switching input modes Choose [  ] , press the ] , press the  button to switch to capital letters. button to switch to capital letters.
Choose [  ] , press the ] , press the  button to switch to numbers and characters. button to switch to numbers and characters. |
 | •Deleting characters Choose [  ] and press the ] and press the  button.
The previous character will be deleted. button.
The previous character will be deleted. |
 |
•Confirming input After pressing the  button, press the button, press the  / /  buttons to choose [OK] , press the buttons to choose [OK] , press the  button. button.
|
 button.