Solution
You can shoot while viewing the image on the camera’s LCD monitor. This is called "Live View shooting".
This section describes how to shoot still photos using the Live View function with the default settings.
CAUTION
- Do not allow the product to maintain contact with the same area of skin for extended periods of time during use. This may result in low-temperature contact burns, including skin redness and blistering, even if the product does not feel hot. The use of a tripod or similar equipment is recommended when using the product in hot places and for people with circulation problems or less sensitive skin.
- Do not point the camera toward an intense light source, such as the sun or an intense artificial light source. Doing so may damage the image sensor or the camera’s internal components.
IMPORTANT
- If you handhold the camera and shoot while viewing the LCD monitor, camera shake may cause blurred images. Using a tripod is recommended in such cases.
- During Live View shooting, the camera will shoot with One-Shot AF in all shooting modes.
- The metering mode will be fixed to evaluative metering for Live View shooting.
- During Live View shooting, some Custom Function settings will not take effect.
1. Set the lens’s focus mode switch to <AF>.
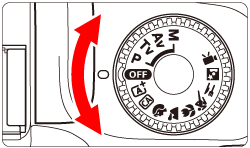
2. Set the Mode Dial to any mode other than <

>.
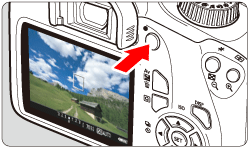
3. Press the <

> button.
- The Live View image will appear on the LCD monitor.
4. When the AF point is displayed, press the <

> cross keys to move the AF point to where you want to focus. (It cannot be moved to the edge of the screen.)

: AF point
- Press <
 > to return the AF point to the center.
5. Press the shutter button halfway to focus.
- When focus is achieved, the AF point will turn green and the beeper will sound.
- If focus is not achieved, the AF point will turn orange.
- If the <
 > icon blinks during shooting in Basic Zone modes, raise the built-in flash with your fingers.
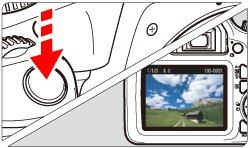
6. Press the shutter button completely.
- The picture is taken and the captured image is displayed on the LCD monitor.
- When the playback display ends, the camera will return to Live View shooting automatically.
7. Press the <

> button to exit the Live View shooting.
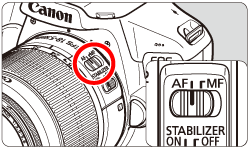
 >.
>.
 > button.
 > cross keys to move the AF point to where you want to focus. (It cannot be moved to the edge of the screen.)
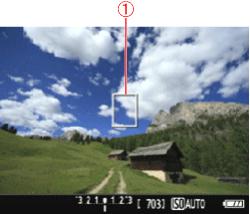

 : AF point
 > to return the AF point to the center.
 > icon blinks during shooting in Basic Zone modes, raise the built-in flash with your fingers.
 > button to exit the Live View shooting.