07-Jan-2016
8202798300

 ] and image stabilization mode [
  ] are displayed in the upper left of the screen.
 ].
].
 ] mode, or operating the camera in other ways.
 ] button.
 ], [
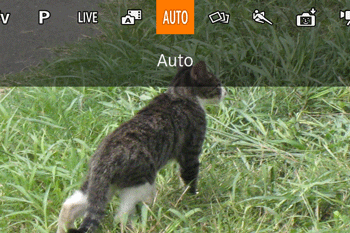
], [  ] buttons and choose a [Shooting mode]*.
 ], [
], [  ] buttons.
 ] is displayed.

 ], [
], [  ] buttons and choose the desired [Shooting mode]*.
 ] button.
 ) is selected here.)

| Mode Dial | Shooting Scene | Shooting Mode | Effect | |
 | Brightness / Color Customization | [Live View Control] (  ) ) | Image brightness or colors when shooting can be easily customized. | |
 | Shooting a Variety of Images and Movies | [Creative Shot] (  ) ) | ・The camera determines the subject and shooting conditions, automatically applying special effects and recomposing the shot to emphasize the subject. Six still images are recorded for each shot. You can capture multiple still images with effects using camera-determined settings. ・Once the movie is shot, the camera determines the subject and shooting scene and automatically applies various effects such as slow motion and fast motion. The camera automatically combines a maximum of four movies into a short movie of approximately 15 – 25 seconds (Creative Shot). Note that sound is not recorded. | |
 | Shooting Moving Subjects | [Sports] (  ) ) | Shoot continuously as the camera focuses on moving subjects. | |
 | Specific Scenes | Shooting Portraits | [Portrait] (  ) ) | Take shots of people with a softening effect. |
| Auto Shooting after Face Detection | [Smart Shutter] (  ) ) | You can choose between the following three options: Auto Shooting after Smile Detection [Smile], Auto Shooting after Wink Detection [Wink Self-Timer], and Auto Shooting after Detecting New Person [Face Self-Timer]. | ||
| Shooting Evening Scenes without Using a Tripod | [Handheld Night Scene] (  ) ) | ・Beautiful shots of evening scenes or portraits with evening scenery in the background, without the need to hold the camera very still (as with a tripod). ・A single image is created by combining consecutive shots, reducing camera shake and image noise. | ||
| Shooting under Low Light | [Low Light] (  ) ) | Shoot with minimal camera and subject shake even in low-light conditions. | ||
| Shooting with a Fish-Eye Lens Effect | [Fish-Eye Effect] (  ) ) | Shoot with the distorting effect of a fish-eye lens. | ||
| Shots Resembling Miniature Models | [Miniature Effect] (  ) ) | Creates the effect of a miniature model, by blurring image areas above and below your selected area. | ||
| Shooting with a Toy Camera Effect | [Toy Camera Effect] (  ) ) | This effect makes images resemble shots from a toy camera by vignetting (darker, blurred image corners) and changing the overall color. | ||
| Shots Resembling Miniature Models | [Miniature Effect] (  ) ) | Creates the effect of a miniature model, by blurring image areas above and below your selected area. | ||
| Shooting with a Soft Focus Effect | [Soft Focus] (  ) ) | This function allows you to shoot images as if a soft focus filter were attached to the camera. You can adjust the effect level as desired. | ||
| Shooting in Monochrome | [Monochrome] (  ) ) | Shoot images in black and white, sepia, or blue and white. | ||
| Shooting in Vivid Colors | [Super Vivid] (  ) ) | Shots in rich, vivid colors. | ||
| Posterized Shots | [Poster Effect] (  ) ) | Shots that resemble an old poster or illustration. | ||
| Shooting Fireworks | [Fireworks] (  ) ) | Vivid shots of fireworks. | ||
 | Shooting Various Movies | Shooting Movies in Standard Mode | [Standard] (  ) ) | Before shooting, you can lock or change the exposure. |
| Shooting Short Clip | [Short Clip] (  ) ) | Apply playback effects to brief clips of a few seconds, such as fast motion, slow motion, or replay. The created movie is used to create a Story Highlights album. | ||
| Shooting iFrame Movies | [iFrame Movies] (  ) ) | Shoot movies that can be edited with iFrame-compatible software or devices. | ||
 ].
].
 ] mode as well, by pressing the movie button. However, some [FUNC.] and [MENU] settings may be automatically adjusted for movie recording.
Tv Mode | Set your preferred shutter speed before shooting. The camera automatically adjusts the aperture value to suit your shutter speed. |
Av Mode | Set your preferred aperture value before shooting. The camera automatically adjusts the shutter speed to suit your aperture value. |
M Mode | Set your preferred shutter speed and aperture value to obtain the desired exposure. |