Shooting Night Scenes under Starry Skies (Star Nightscape) (PowerShot G5 X)
Solution
Capture impressive shots of starry skies above night scenes. Starlight in the image is automatically enhanced, making starry skies look beautiful.
- Procedures for shooting in Star Nightscape mode are explained below.
1. Press the power button to turn the camera on.
2. Set the mode dial to [SCN].

3. Press the < > button when the shooting screen is displayed.
 > button when the shooting screen is displayed.
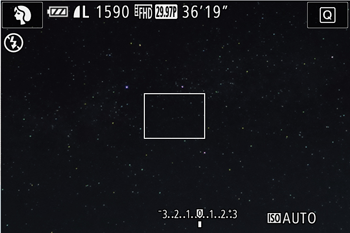

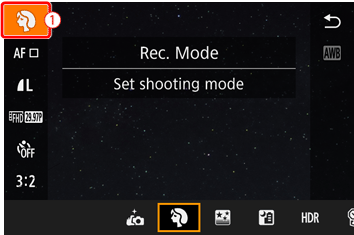
4. When the menu options are displayed, press the < ><
>< > buttons to choose [Shooting mode] (
 ) in the upper left of the screen, and then press the <
 > button.
 ><
>< > buttons to choose [Shooting mode] (
 ) in the upper left of the screen, and then press the <
 > button.

REFERENCE
- If the default settings have not been changed, [
 ] will be displayed.
5. Press the < ><
>< > buttons to choose [
  :Star] from the options displayed at the bottom of the screen, and then press the <
 > button.
 ><
>< > buttons to choose [
  :Star] from the options displayed at the bottom of the screen, and then press the <
 > button.
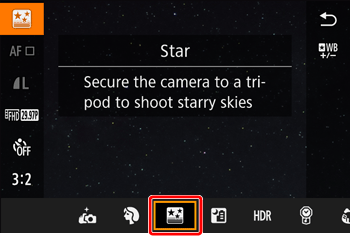
6. Press < > when the following screen is displayed.
 > when the following screen is displayed.
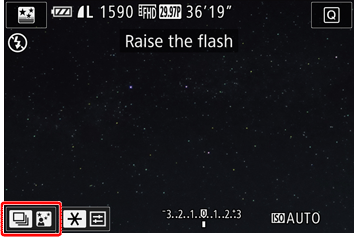

7. Press the < ><
>< > buttons to choose [
  : Star Nightscape] from the options appearing on the bottom of the screen, and then press the <
 > button.
 ><
>< > buttons to choose [
  : Star Nightscape] from the options appearing on the bottom of the screen, and then press the <
 > button.
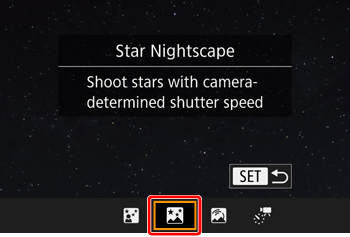
NOTE
- Zoom is set to maximum wide angle and cannot be adjusted.
8. Mount the camera on a tripod or take other measures to keep it still and prevent camera shake.
9. Press the shutter button all the way down to shoot.
IMPORTANT
- There will be a delay before you can shoot again, as the camera processes the images.
- ISO is set to Auto and cannot be changed.
- Aperture cannot be changed manually.
NOTE
- For easier viewing, try choosing MENU > [
 ] tab > [Night Display] > [On] before shooting.

- To make stars brighter, choose MENU > [
 ] tab > [Star Emphasis] > [Sharp]. To emphasize the bright stars in a starry sky, set [Star Emphasis] to [Soft]. This setting can produce eye-catching shots by enlarging bright stars while de-emphasizing dimmer stars. To disable starlight processing, select [Off].

- Try switching to manual focus mode to more accurately specify the focal position before shooting.

