30-Apr-2015
8202600400
 ], or resized to [ ].
 ] button to enter Playback mode.
 ], [
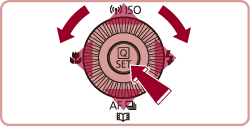
], [  ] buttons or turn the [
  ] dial to select the desired image, and then press [
  ].
]. ], [
], [  ] buttons to select [
  ] in the menu, and then press [ ].
 ] dial to choose the individual icons.
 |  Cropping Frame | ・To resize the frame, move the zoom lever.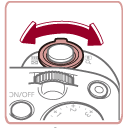 ・To move the frame, press the [ ], [ ], [ ], [ ] buttons. |
 |  Preview the cropped image. | To switch display between the cropped image and the cropping frame, press the [ ] button repeatedly. |
 |  Change the frame orientation | Press the [ ] button to change the frame orientation. |
 |  Change the frame aspect ratio | Press the [ ] button to switch between the [3:2], [16:9], [4:3], [1:1] aspect ratios. |
 |  Save as a new image | Press the [ ] button to save the cropped image as a new image. |
 |  Return to the previous screen | Press the [ ] button to return to the previous screen. |
].To switch display between the cropped image and the cropping frame, press the [ ] button repeatedly.

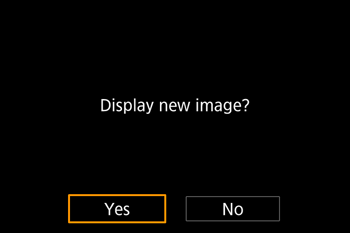
 ] and press the [ ] button.
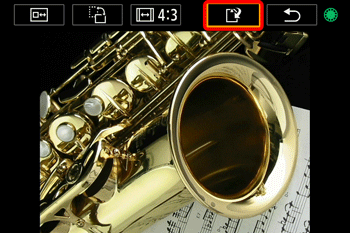 ] button.
 ] button.