06-Feb-2015
8202444200
 ) mode.
 ] mode, the camera can show you which [
  ] mode settings correspond to which camera settings, making it easier to step up to the Creative Auto shooting modes ([
  ], [
], [  ], [
], [  ], or [
  ]).
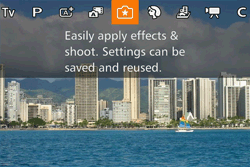
]).
 ] cannot be set.
 ] icon in the following explanation.
 Background Background | This lets you define how much to blur the background. The higher the value this is, the more blurred the background gets. The lower the value, the sharper the background. |
|---|---|
 Brightness Brightness | This lets you adjust the image brightness. The higher this value, the brighter the image is. |
 Contrast Contrast | This lets you adjust the contrast. The higher this is, the stronger the contrast between light and dark colors. |
 Saturation Saturation | This lets you define how vivid the colors are. The higher this value, the more colorful the image; the lower it is, the more subdued and refined it becomes. |
 Color tone Color tone | This lets you define the tone of the colors. Higher values result in warmer colors, while lower ones make the colors seem colder. |
 Monochrome Monochrome | You can choose from five color tones in Monochrome: [  B/W], [ B/W], [  Sepia], [ Sepia], [  Blue], [ Blue], [  Purple] and [ Purple] and [  Green]. Green]. Set this to [  ] to shoot in color. If this is set to anything besides [ ] to shoot in color. If this is set to anything besides [  ], [Saturation] and [Color tone] are not available. ], [Saturation] and [Color tone] are not available. |

 ].
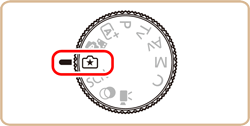
].
 ] button, press the [
  ], [
], [  ] buttons to choose the desired setting,, and then press the [
  ], [
], [  ] buttons or turn the [
  ] dial or [
  ] dial to complete the setting.

 ] button to return to the shooting screen.
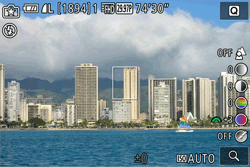
 ] shown next to them in the shooting screen by turning the [
  ] dial. Press the [
  ], [
], [  ] buttons to move the [
  ], and select the option to adjust.
 Keep setting] in [
  - 4] to [Enable] to save your settings even after turning off the camera.
 ] at the upper right of the screen to show settings. You can also touch options in the settings screen to adjust them. Touch [
  ] to return to the shooting screen.
 ] and set up your preferences.
 ] button, press the [
  ], [
], [  ] buttons to choose
  [
[  ], then press the [
  ], [
], [  ] buttons or turn the [
  ] dial or [
  ] dial to select
  where to save your settings.
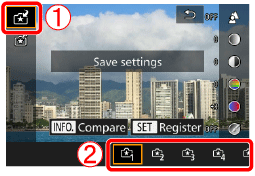
 Compare] will be displayed. In this mode, when you press the [
  ] button, the previously-saved settings will be displayed onscreen, letting you compare them with your new settings.
 ] button, and a confirmation screen will appear. Press the [
  ], [
], [  ] buttons or turn the [
  ] dial to select [OK], then press the [
  ] button.
 ].
].
 ] button, press the [
  ], [
], [  ] buttons to choose
  [
[  ], then press the [
  ], [
], [  ] buttons or turn the [
  ] dial or [
  ] dial to select
  the settings to load.
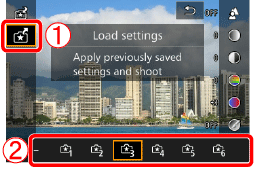
 ] button to apply the saved settings.
 ] button to go back without applying any settings.
 ] mode and use them to shoot your own pictures.
 ].
].
 ] button to enter playback mode, and then select an image shot in [
  ] for display.
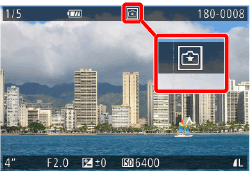
 ] icon will be displayed on images captured in [
  ] mode when information is displayed.
 ] icon, press the [
  ] button several times to switch between information display 1 (basic info.), information display 2 (details).
 ] button, choose [
  ] in the menu, and press the [
  ] button again.
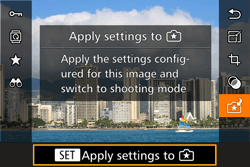
 ]. The camera does not return to shooting mode. Turn the mode dial to [
  ] to apply the settings.
 ] mode will not be shown in [
  ] mode.
 ] mode, press the [
  ] button to display the screen shown to the left, letting you view the settings used when the picture was taken.
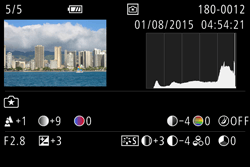
 ] Mode and Creative Zone Settings
[  ] mode setting ] mode setting | Creative Auto setting |
|---|---|
| (A) Background | (a) Aperture value |
| (B) Brightness | (b) Exposure compensation Flash time is (b') Flash exposure compensation |
| (C) Color tone | (c) WB Correction |
| (D) Contrast | (d) Picture Style contrast |
| (E) Saturation | (e) Picture Style saturation |
| (F) Monochrome | (f) Picture Style  filter and toning effect filter and toning effect |