Solution
Streaks created by the movement of stars through the sky are recorded in a single image. After determining the shutter speed and number of shots, the camera shoots continuously. A shooting session can last up to about two hours. Check the battery level in advance.
The procedure for shooting star trails is explained below.
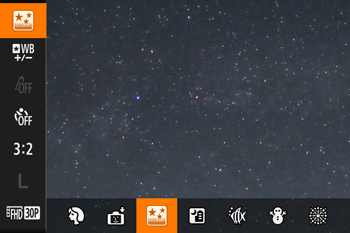
1. Press the <Power> button to turn the camera on.
2. Set the mode dial to [

].
3. Press the <

> button, choose [

]* in the menu, press the <

><

> buttons or turn the <

> dial to choose [

], and then press the <

> button.
*If the default settings have not been changed, [

] will be displayed.
4. Press the <

> button, press the <

><

> buttons or turn the <

> dial to choose [

], and then press the <

> button.
Zoom is set to maximum wide angle and cannot be adjusted.
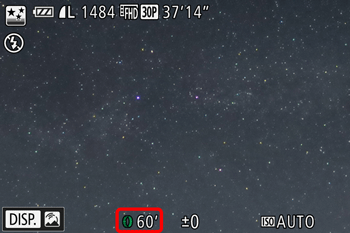
5.5. Turn the <

> ring to choose the shooting duration. The maximum duration that can be chosen is 120 min
The time you specified will be retained even if the mode dial is set to a different mode. However, the time will be reset if the power is turned off.
6. Mount the camera on a tripod or take other measures to keep it still.
7. Press the shutter button all the way down to shoot.
[Busy] is displayed briefly, and then shooting begins.
- Do not disturb the camera while shooting.
- To cancel shooting, press the shutter button all the way down again. Note that cancellation may take up to about 60 seconds.
This concludes the explanation of the procedure for shooting star trails.
REFERENCE
- If the camera runs out of battery power, shooting stops and a composite image created from the images up to that point is saved.
- There will be a delay before you can shoot again, as the camera processes the images.
- ISO is set to Auto and cannot be changed.
- Aperture cannot be changed manually.
- Please use exposure compensation to change the brightness.
- After shooting, the [Date/Time] will be recorded in the image.
NOTE
- For easier viewing, try choosing MENU > [
 ] tab > [Night Display] > [On] before shooting.
- Try switching to manual focus mode to more accurately specify the focal position before shooting.
- Battery performance decreases at low temperatures. Try warming the battery pack a little by putting it in your pocket, for example, ensuring that the terminals do not touch any metal objects.
 ].
].
 > button, choose [
  ]* in the menu, press the <
 ><
>< > buttons or turn the <
 > dial to choose [
  ], and then press the <
 > button.
 ] will be displayed.
 > button, press the <
 ><
>< > buttons or turn the <
 > dial to choose [
  ], and then press the <
 > button.
 > ring to choose the shooting duration. The maximum duration that can be chosen is 120 min

 ] tab > [Night Display] > [On] before shooting.