23-Jan-2015
8202107800
 ] button to turn the camera on.
 ], [
], [  ] buttons to choose an image.
 ] button.
 ] button to choose [Erase], and then press the [
  ] button.
 ] button to turn the camera on.
 ] button.
 Press the [
  ], [
], [  ] buttons to choose the [
  ] tab.
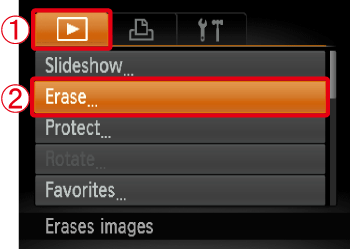
 Press the [
  ], [
], [  ] buttons to choose [Erase], and then press the [
  ] button.
 ], [
], [  ] buttons to choose [Select Range], and then press the [
  ] button.
 ] button.
 ], [
], [  ] buttons to choose the [First Image] in the series of images that you want to erase, and then press the [
  ] button.
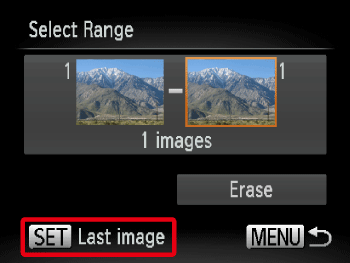
 ] button to choose [Last image]. The following screen will be displayed.
 ] button.
 ], [
], [  ] buttons to choose the [Last Image] in the series of images that you want to erase, and then press the [
  ] button.
 ], [
], [  ] buttons to choose [Erase].
 ] button to erase the images in the specified range.