Solution
IMPORTANT
- The screens and settings that appear may differ depending on the model you are using.
- To import the video files you have recorded to a computer, it is necessary to install PIXELA VideoBrowser, which came with your camcorder.
- The following explanations use Windows 7 and PIXELA VideoBrowser 1.0 in their examples. Depending on the operating system on your computer or the version of the application that came with your camcorder, the screens shown and operations required may differ from those shown here.
1. Power the camcorder using the compact power adapter.
2. Open the date index screen.
3. Connect the camcorder and the computer with the USB cable supplied with the camcorder.
Connect directly to the computer. Operation using a USB hub is not guaranteed.
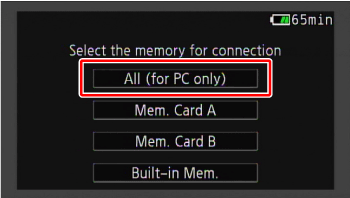
- Camcorder: When the connection is successfully established, [Select the memory for connection] appears on the screen.
Select [All (for PC only)].
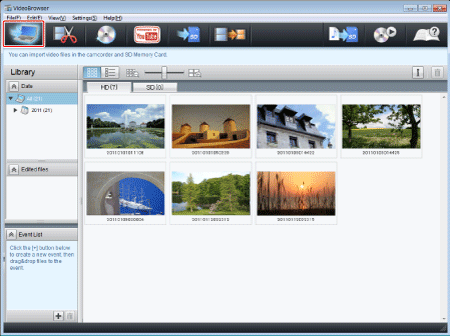
Computer: VideoBrowser will start up automatically.
Importing the recorded video files to a computer using PIXELA VideoBrowser
- If you have supported video files used in ImageMixer 3 SE on your computer, a message asking whether to import them will appear.
- If you connected a hard disk that stores the video files backed up directly from the camcorder, the message asking whether to add these files to the library will be displayed. (If you click [OK], these files will be added to the library without saving the copies in the computer.)
NOTE
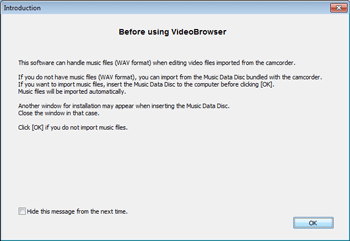
When editing video files with VideoBrowser, you can use music files of WAV format. If you do not have the music files of WAV format, you can import them from the Music Data Disc bundled with the camcorder.
If you want to import, insert the Music Data Disc while the screen on the bottom is displayed. Importing will start automatically.
Check the box if you do not want to display this message from the next time.
1. Click [

].
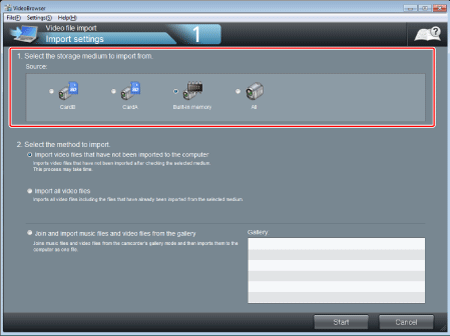
2. Select the memory that contains the video files you want to import.
 | The built-in memory of the camcorder. |
 | Both the built-in memory and SD Memory Card in the camcorder. |
 | A card reader/writer or other devices. |
 | A card reader/writer or other devices. |
 | A disc inserted in the disc drive. |
3. Select the method to import.
- Import the video files which have not been saved in the computer:
Import the files which have not been imported to the computer yet.
Imports all files in the selected memory.
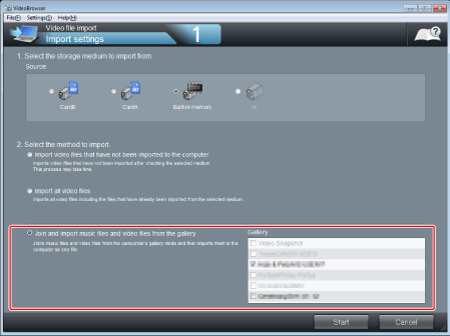
Decide whether to import video files in the Gallery mode combining with music files.
You can import a single video file after combining the video files in the Gallery mode with music files.
4. Click [Start].
Importing will start. The Library screen will be displayed after finishing importing.
* Though the screen will be switched at the middle of importing, wait until the "Adding files..." message disappear. Importing may take time if the number of files is large.
REFERENCE
Imported video files will be saved in the following location:
- Windows Vista/Windows 7/Windows 8
C:\Users\(User account name)\My Videos\Import Video Data for SD
*Files are saved in [My Documents] if [My Videos] does not exist.
C:\Documents and Settings\(User account name)\My Documents\My Video\Import Video Data for SD
*Files are saved in [My Documents] if [My video] does not exist.
 ].
].