21-Mar-2013
8201759700
 ) button on the camera.
 > button.
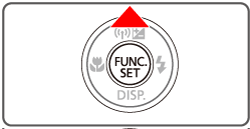

 ) button to access the keyboard.
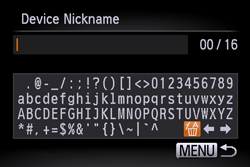
 ><
>< ><
>< ><
>< > buttons to choose a character, and then press the <FUNC./SET> () button to enter it.
 ] or [
  ] and press the <FUNC./SET> () button to move the cursor.
 ] and press the <FUNC./SET> () button.
  > button, press the <><> buttons to choose [OK], and then press the <FUNC./SET> button ().><><><> buttons to choose [
  ], and then press the <FUNC./SET> () button.
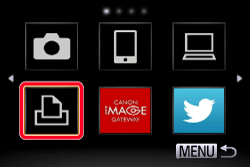 ><> buttons to choose [Add a Device], and then press the <FUNC./SET> () button.
 > button. The recent target device is listed first, so you can easily connect again by pressing the <><> buttons to choose it. To add a new device, display the device selection screen by pressing the <><>buttons, and then configure the setting.> button, and on the [
  ] tab, choose [Wi-Fi Settings] > [Target History] > [Off].
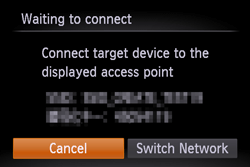 ) button when the printer name is displayed on the camera.
 ><> buttons to choose an image.)button, press the <><> buttons to choose [
  ], and then press the <FUNC./SET> () button again to access the printing screen.
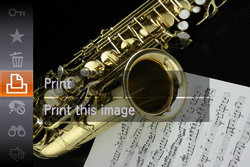
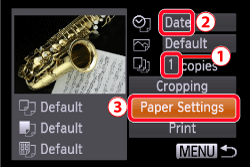 ><> buttons to choose
  the number of prints. ><> buttons to set the
  [Date].
 [Paper Settings].
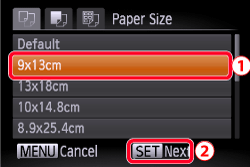 ><> buttons to choose the paper size, and press the <FUNC./SET> () button.
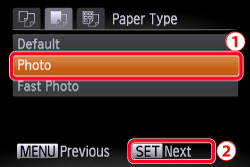 ><> buttons to choose a paper size, and press the <FUNC./SET> () button.
 ><> buttons to select the layout, and then press the <FUNC./SET> () button.
 Make sure that the settings are correct, and then press the <FUNC./SET> () button to begin printing.