Solution
First, sign up for a free CANON iMAGE GATEWAY account.
CANON iMAGE GATEWAY offers various services, such as the ability to share images in an online photo album. CANON iMAGE GATEWAY also serves as a bridge site to send images wirelessly to e-mail addresses, social networking services, and other Web services. Click http://canon.com/ cig, access the appropriate CANON iMAGE GATEWAY site for your country of residence, and follow the on-screen instructions to register as a member. You can continue to register other Web services other than CANON iMAGE GATEWAY to your account. For further details, check the websites for each web service you want to register.
NOTE
- An Internet connection is required to access CANON iMAGE GATEWAY (an Internet browser must be installed on the computer, you must have an account with an Internet service provider, and an Internet connection must be established).
- Check CANON iMAGE GATEWAY for browser (Microsoft Internet Explorer, etc.) settings, conditions and version information when connecting to CANON iMAGE GATEWAY.
- Separate ISP connection and access point fees may be applicable.
Adjusting Settings for Using Web Services From CANON iMAGE GATEWAY
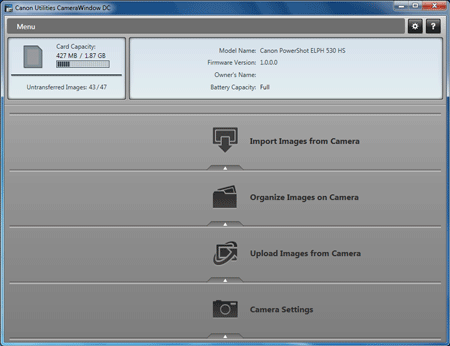
Adjust account settings for the Web services you want to use. Because CameraWindow is used to adjust settings, be sure to install it from the included CD-ROM beforehand.
1. Connect the camera to a computer with the interface cable.
NOTE
- When using a Windows computer, you can connect wirelessly, without using an interface cable, however settings must be completed beforehand. For information about how to make the settings, please see the "Preparing to Register a Computer" section of Getting Started (Wireless LAN Guide).
Press the <

> button to turn the camera on.
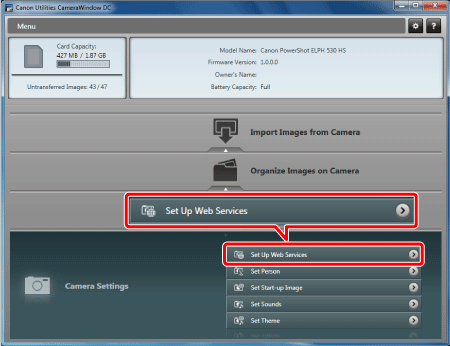
3. Choose [Set Up Web Services].
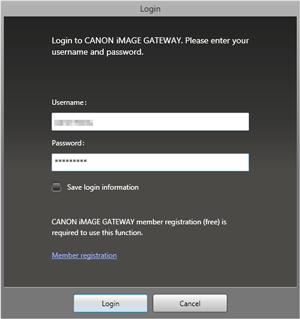
4. Login to CANON iMAGE GATEWAY.
- Enter your CANON iMAGE GATEWAY login name and password, and then click [Login].
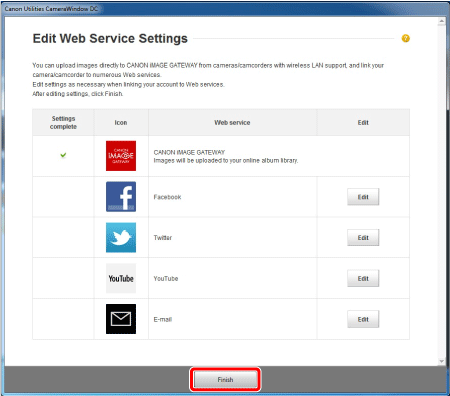
5. Set a Web service you want to use.
Follow the on-screen instructions to complete settings for Web services you want to use.
Once the Web service settings are complete, click [Finish] at the bottom of the window to close it.
NOTE
- Up to 20 e-mail addresses can be registered to the camera for sending images as e-mail.
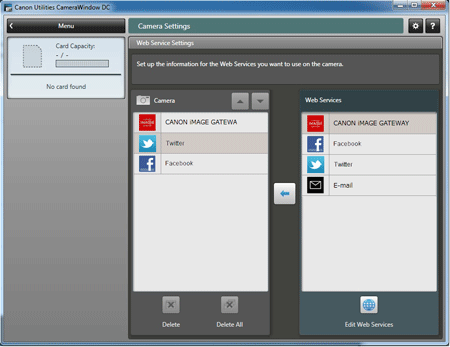
- After logging in to CANON iMAGE GATEWAY the second time in step 4, the screen in step 6 will be displayed. To change settings for Web services you use, click [Edit Web Services].
6. Apply Web service settings to the camera.
- Choose the name of the Web service you want to set, and click[
 ] in the middle of the lists.
- The name of the Web service that will be saved to the camera will be displayed in the [Camera] list.
- Click [
 ] or [
  ] to change the order of the Web services that will be displayed in the camera’s wireless LAN menu.
- After you finish adjusting settings in the [Camera] list to your liking, close the window.
- Web service settings will be applied to the camera.
NOTE
- To add or change Web services, repeat the above procedures starting from step 1.
Connecting to Web Services
7. Press the <

> button to turn the camera on.
8. Press the <Wireless LAN> (

)button.
Press the<directional buttons> or turn the <

> dial to choose the icon of the destination Web service, and then press the <

> button.
When you have selected email, choose the recipient on the [Select Recipient] screen and press the <

> button.
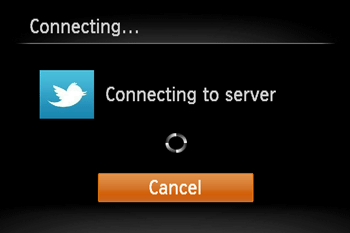
10. Connect to an access point.
Press the <directional buttons> or turn the <

> dial to choose [Add an Access Point], and then press the <

> button.
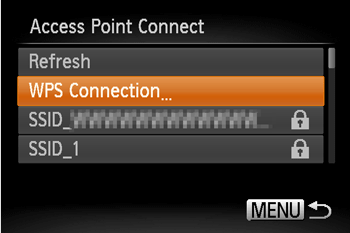
- A list of detected access points will be displayed in the [Access Point Connect]screen.
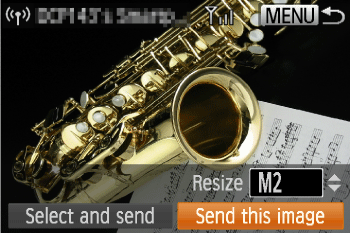
11. When the connection is made, the screen for sending images will appear.
REFERENCE
- You can send up to 50 images together with one send operation. You can send movies together as long as the total playback time is within 2 minutes.However, if the destination is a Web service, the number of movies and images that can be sent may be less depending on the Web service. See the desired Web service for details.
- Depending on the condition of the network you are using, it may take a long time to send movies. Be sure to keep an eye on the camera battery level.
NOTE
- When a connection destination is set using the Touch Actions setting, you can automatically access the function to connect to the last connected destination from the next time by just dragging on the screen without needing to perform the connection operation. See the Camera User Guide for details on Touch Action settings.
 > button to turn the camera on.
 ] in the middle of the lists.
 ] or [
  ] to change the order of the Web services that will be displayed in the camera’s wireless LAN menu.
 > button to turn the camera on.
 )button.
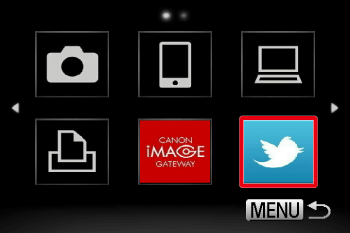
 > dial to choose the icon of the destination Web service, and then press the <
 > button.
 > button.
 > dial to choose [Add an Access Point], and then press the <
 > button.