How to install the CAPT software using the CD-ROM supplied with the printer
Solution
IMPORTANT
Operational requirements and restrictions are indicated at the end of this page. Be sure to read these items carefully in order to operate the printer correctly, and to avoid damage to the printer.
1. Insert the supplied "LBP5300 User Software" CD-ROM into the CD-ROM drive.
If the CD-ROM is already in the drive, eject the disk and re-insert it into the drive.
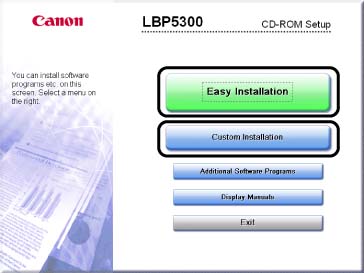
2. Click [Easy Installation] or [Custom Installation].
[Easy Installation] allows you to install the printer driver and the instruction manuals simultaneously. If you do not install the manuals, select [Custom Installation].
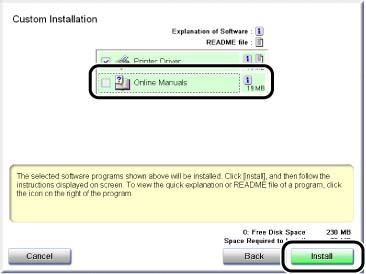
3. Click [Install].
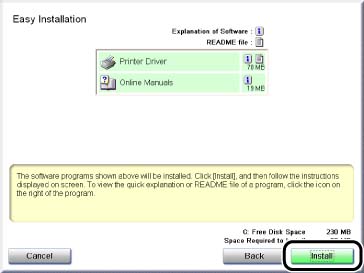
If you selected [Custom Installation] in Step 2, clear the [Online Manuals] check box, and then click [Install].
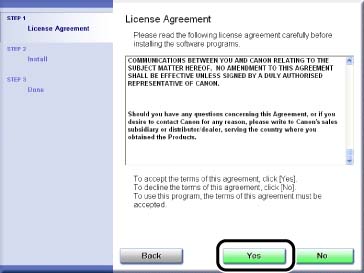
4. Confirm the contents, then click [Yes].
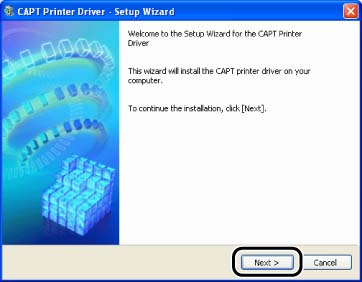
5. Click [Next].
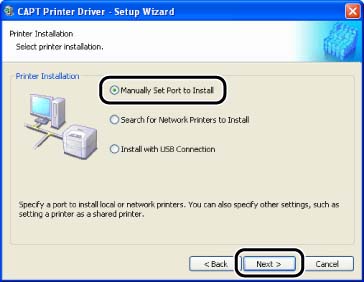
6. Select [Manually Set Port to Install], then click [Next].
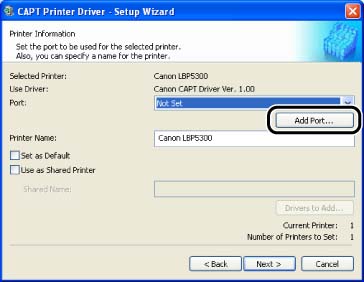
7. Click [Add Port].
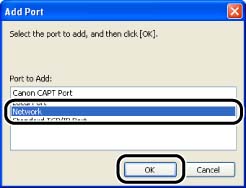
8. Select [Network], then click [OK].
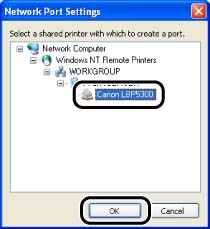
9. Select the icon for the shared printer in the print server, then click [OK].
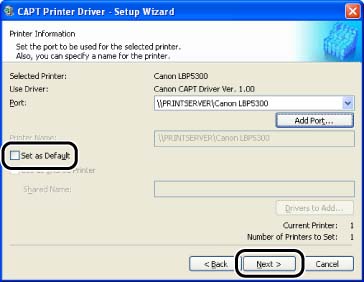
10. Select whether or not to use this printer as the default printer, then click [Next].
11. Click [Start].
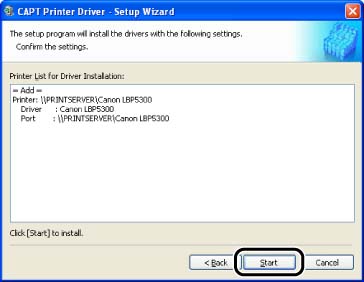
If you are using Windows XP Service Pack 2 or another operating system equipped with Windows Firewall, the following screen is displayed. Click [No].

Select [Yes] only when the computer on which you are currently installing the printer driver is to be used as a print server.
12. The message <Installation cannot be stopped once it starts. Do you want to continue?> appears. Click [Yes].

Installation of the printer driver starts.
13. If [Easy Installation] is selected in Step 2, the manuals are installed.
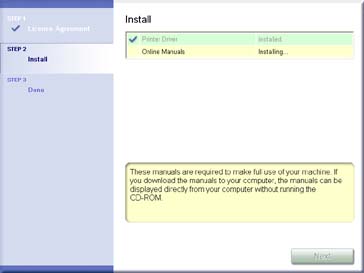
14. Confirm the installation results, then click [Next].

15. Select the [Restart Computer Now (Recommended)] check box, then click [Restart].
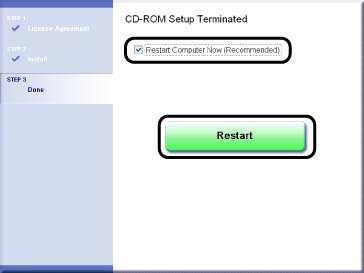
Windows restarts.
IMPORTANT
a. If you are using Windows 2000/XP/Server 2003, be sure to log on as a member of Administrators when starting up.
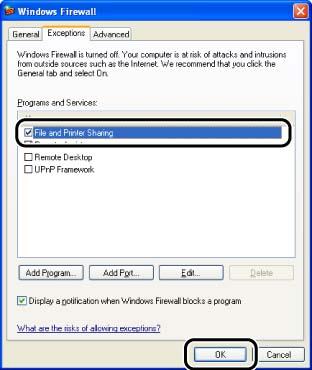
b. If you are using Windows XP Service Pack 2 or another operating system equipped with Windows Firewall on a client computer, configure the following settings. If you do not perform the following settings on the client computers, the printer status may not be displayed properly in the Printer Status Window, and some of the printer functions may not operate properly.
1. From the [Start] menu, select [Control Panel], and then click [Network and Internet Connections] -> [Windows Firewall].
2. In the [Exceptions] sheet in the [Windows Firewall] dialog box, select the [File and Printer Sharing] check box, and then click [OK].
c. If CD-ROM Setup does not appear, select [Run] from the [Start] menu, enter "D:\English\MInst.exe", and then click [OK]. (The CD-ROM drive name is indicated as "D:" in this manual. The CD-ROM drive name may differ depending on the computer you are using.)
d. If you are using Windows XP Service Pack 2 or another operating system equipped with Windows Firewall on the client computers, configure Windows Firewall to unblock communication with the print server. If you do not clear the block, the printer status may not be displayed properly in the Printer Status Window, and some of the printer functions may not operate properly. For details on the procedure for configuring Windows Firewall to unblock communication with the print server, see "Configuring Windows Firewall to unblock communication with the print server" in Related Information at the end of this page.
NOTE
a. Clients can use either Windows 98/Me or Windows 2000/XP/Server 2003.
b. The screen shots used in this section are from Windows XP Professional.
c. If the printer driver is not installed properly, see "Chapter 7 Troubleshooting" in User's Guide (PDF manual) in the CD-ROM supplied with the printer.

