How to load custom size paper in the paper cassette
17-May-2012
8201552600
Issue
Cause and Solution
Load custom size paper in the paper cassette using the following procedure.
Be sure to load custom size paper in portrait orientation when loading it in the paper cassette.
IMPORTANT
Operational requirements and restrictions are indicated at the end of this page. Be sure to read these items carefully in order to operate the printer correctly, and to avoid damage to the printer.
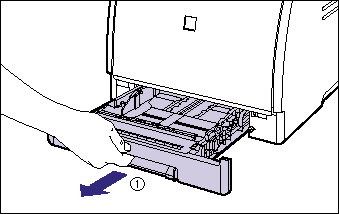
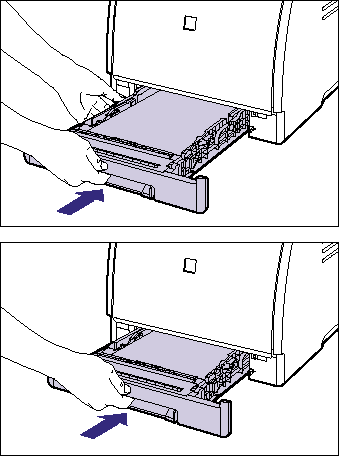
1. Pull out the paper cassette.
Pull out the paper cassette gently (1).
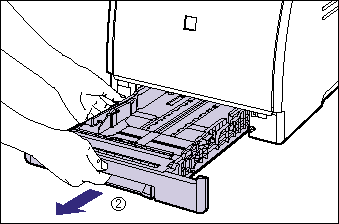
While holding the paper cassette with both hands, remove it from the printer unit as shown in the figure (2).
2. When loading paper that is larger than A4 size (297.0 mm), adjust the length of the paper cassette while holding the lock release lever shown in the figure.
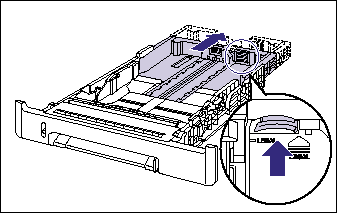
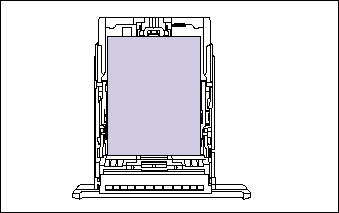
3. Load the paper so that the edge of the paper is aligned with the front side of the paper cassette.
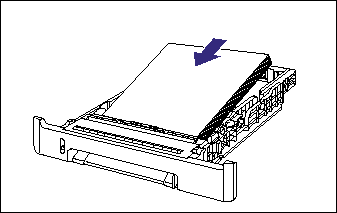
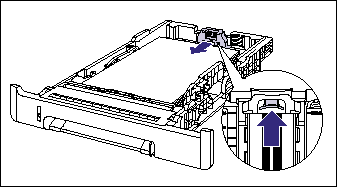
4. While holding the lock release lever of the side paper guides, slide the guides to the mark for the size of the loaded paper.
The side paper guides move together.

5. While holding the lock release lever of the rear paper guide, slide the guide to the size mark for the loaded paper.
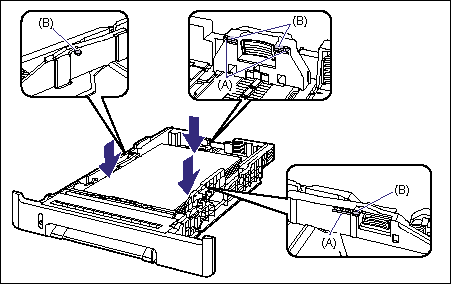
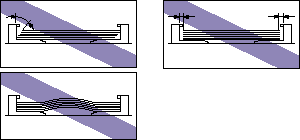
6. Hold down the paper as shown in the figure, make sure that the paper stack does not exceed the load limit marks (A), and then set it under the hooks (B) on the paper guides.
Make sure that there is sufficient space between the hooks of the paper guides and the paper stack. If there is no sufficient space, slightly reduce the amount of paper.
7. Set the paper cassette in the printer.
Push the paper cassette into the printer firmly until the front side of the cassette is flush with the front surface of the printer.
8. Register the size of the loaded paper using the following procedure.
This printer's paper cassette cannot automatically detect the paper size. Therefore, you need to register the size of the loaded paper.
9. Display the Printer Status Window.
For details on methods for displaying the Printer Status Window, see "Displaying the Printer Status Window" in Related Information at the end of this page.
10. From the [Options] menu, select [Device Settings] -> [Register Paper Size in Cassettes].
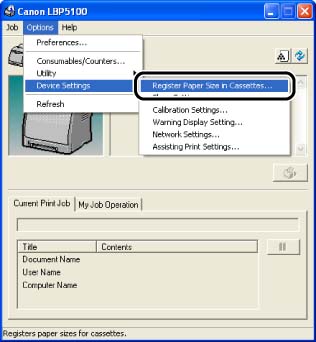
11. Select [Custom], then click [OK].

If you want to print after loading custom size paper in the paper source, you need to register the custom paper size in the printer driver, and then configure the printer driver. For more details, see "How to register a custom paper size (non-standard paper)" or "How to configure the printer driver and print" in Related Information at the end of this page.
IMPORTANT
a. When any paper is in the manual feed slot, you cannot feed paper from the paper cassette. If you are printing from the paper cassette, remove any paper loaded in the manual feed slot.
b. Do not pull out the paper cassette while the printer is printing. This may result in paper jams or damage to the printer.
c. Refill the paper cassette after all the loaded paper runs out. If the cassette is refilled when paper still remains in the cassette, it may result in misfeeds.
d. Do not load paper in the manual feed slot during printing from the paper cassette. This may result in multiple sheets of paper fed at once or paper jams.
e. Do not touch the black rubber pad (A) in the paper cassette. This may result in misfeeds.

f. If you are printing from Cassette 2, make sure that Cassette 1 is set before printing. If you print from Cassette 2 when Cassette 1 is not set, this will cause paper jams.
g. For more details on the usable paper, see "Usable paper" in Related Information at the end of this page.
h. If you use paper that has been poorly cut, multiple sheets of paper may be fed at once. In this case, fan the paper thoroughly, and then align the edges of the stack on a hard, flat surface.
i. Be sure to align the paper guides with the width of the paper. If the paper guides are too loose or too tight, this may result in misfeeds or paper jams.
NOTE
a. Load custom size paper in Cassette 2 (Only when the optional paper feeder is installed) in the same manner as you load custom size paper in Cassette 1.
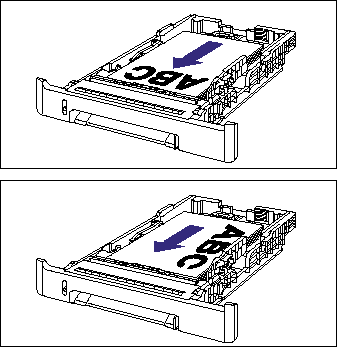
b. To print letterhead paper or paper printed with a logo, load the paper so that the printing side is facing up, as shown in the following figure.
( : Feeding direction)
 : Feeding direction)