Issue
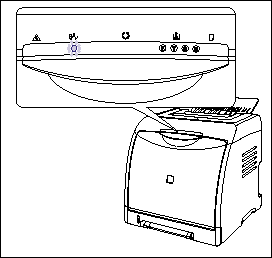
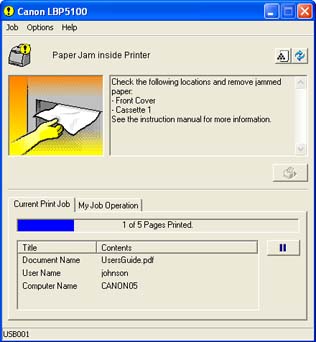
When a paper jam occurs during printing, the Paper Jam indicator (orange) blinks, and the following messages appear in the Printer Status Window.
Cause and Solution
IMPORTANT
Operational requirements and restrictions are indicated at the end of this page. Be sure to read these items carefully in order to operate the printer correctly, and to avoid damage to the printer.
Paper Jam Area:
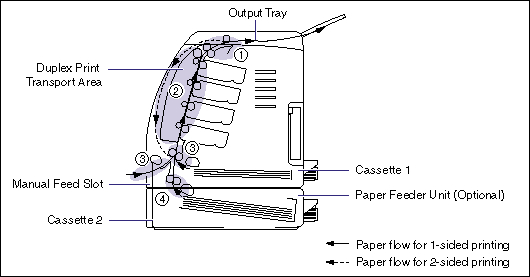
The messages displayed in the Printer Status Window indicate where the paper is jammed, and there are the following kinds.
| Paper Jam Area | Message |
| (1) | Inside the top cover, Output tray | <Top Cover> |
| (2) | Inside the front cover, Duplex print transport area | <Front Cover> |
| (3) | Manual feed slot, Cassette 1 | <Cassette 1> |
| (4) | Cassette 2 (only when the paper feeder is installed) | <Cassette 2> |
Procedure for Clearing Paper Jams:
Follow the instructions below to remove the jammed paper:
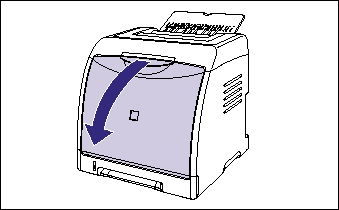
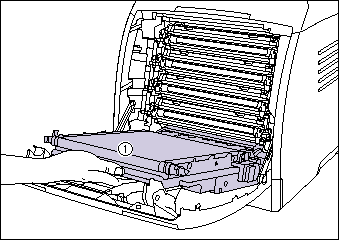
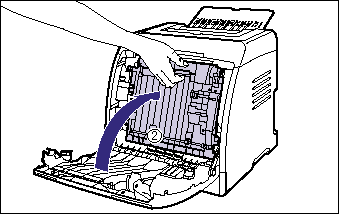
1. Open the front cover.
Holding the opening of the front cover, open it gently.
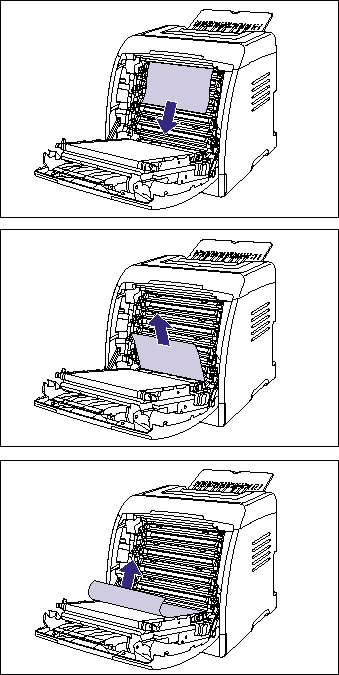
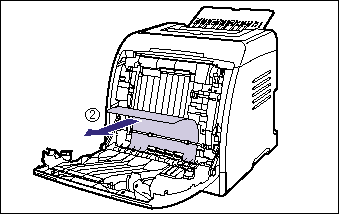
2. Remove any jammed paper by pulling it in the direction of the arrow.
Remove the jammed paper in the direction of the arrow gently to prevent unfixed toner from spilling. Remove the paper, being careful not to touch the transfer belt of the ETB unit or toner cartridge.
3. If a paper jam occurs when performing 2-sided printing, perform the following procedure.
If you are not performing 2-sided printing, proceed to the next step.
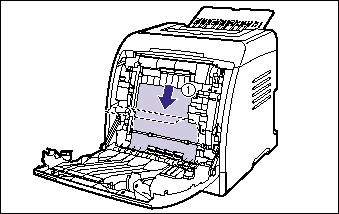
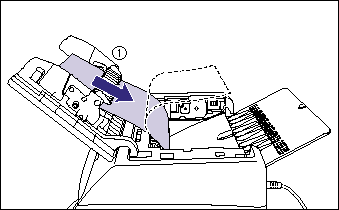
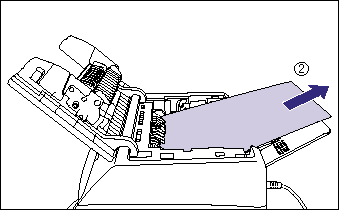
- While holding the handle of the duplex unit (1), raise the duplex unit to the position shown in the figure (2).
- Pull the rear edge of the jammed paper (1), then pull out the paper in the direction of the arrow to remove the paper (2) as shown in the figure.
4. Holding the top cover by the hooks (A) on the both side (1), open the top cover (2).
5. When the paper is caught in the top cover, pull out the top edge of the paper (1), and then remove the paper (2) as shown in the figure.
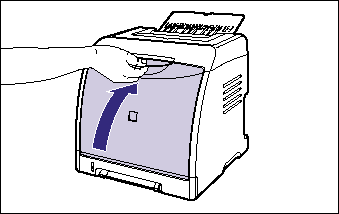
6. Close the front cover.
Holding the opening of the front cover, close it gently.
7. Perform the following procedure with the top cover open. Be careful so that the top cover does not close.
8. If you are using the manual feed slot, remove any paper jammed in the manual feed slot.
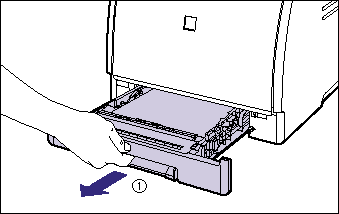
9. Pull out the paper cassette.
Pull out the paper cassette gently (1).
While holding the paper cassette with both hands, remove it from the printer unit as shown in the figure (2).
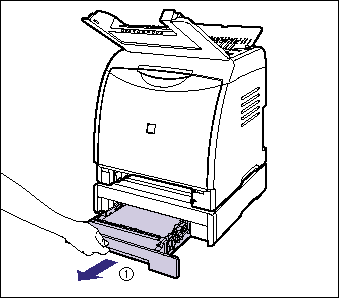
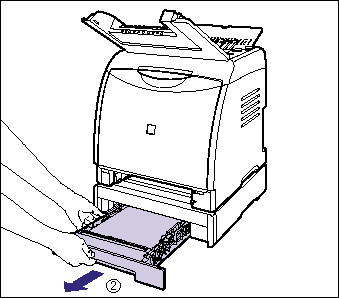
10. If the optional paper feeder is installed, pull out the paper cassette of the paper feeder.
Pull out the paper cassette gently (1).
While holding the paper cassette with both hands, remove it from the paper feeder as shown in the figure (2).
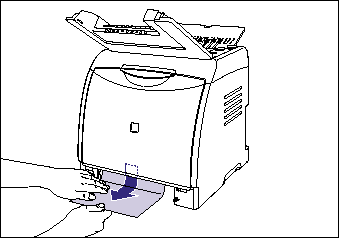
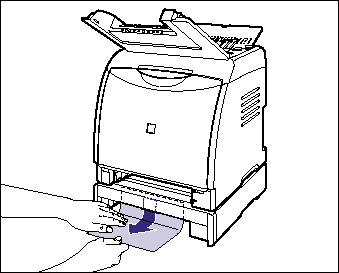
11. Remove any jammed paper while pushing it downward to some extent.
- In case of the printer unit
- In case of the paper feeder
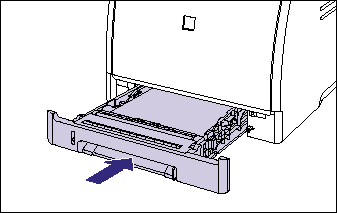
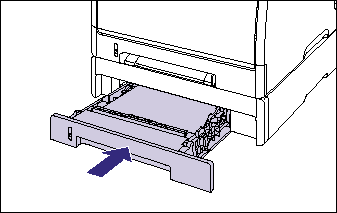
12. Set the paper cassette in the printer.
Push the paper cassette into the printer firmly until the front side of the cassette is flush with the front surface of the printer.
If the paper feeder is installed, set the paper cassette of the paper feeder also.
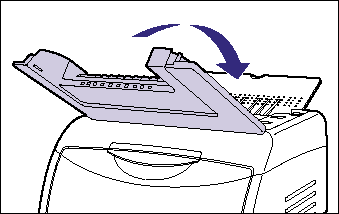
13. Close the top cover.
IMPORTANT
a. Remove jammed paper while the power of the printer is ON. If the power is turned OFF, the data being printed will be deleted.
b. Applying excess force may result in tearing paper or damaging the parts in the printer. When removing jammed paper, pull out the paper in the most appropriate direction, judging from the position of the paper.
c. If paper is torn, be sure to find and remove any remaining pieces of paper.
d. The error message may remain if jammed paper is removed without opening the front cover. In this case, open and close the front cover once.
e. Do not place any object on or touch the transfer belt (A) of the ETB unit. The transfer belt of the ETB unit is supplied with a function that cleans itself, therefore, do not clean the belt even when the toner is on it. If the ETB unit is broken or transfer belt is damaged, this may result in misfeeds or deterioration in print quality.
f. Do not touch the feed rollers (A) in the printer unit and paper feeder. This may result in damage to the printer or printer error.
