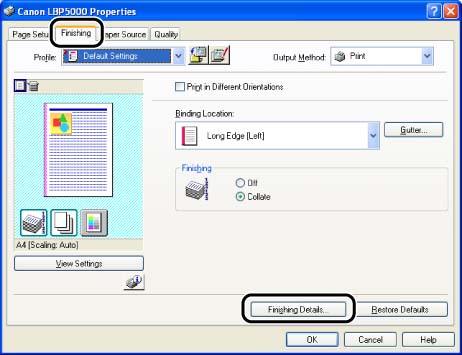
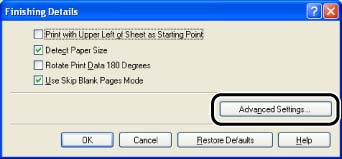
4. Specify the setting for [Special Print Mode].
[Special Print Mode] in the [Advanced Settings] dialog box provides several settings for solving and preventing the problems related to the printing quality. Specify them after fully reading respective description.
- [Special Settings 1]:
Depending on the paper type or the operating environment (especially in a high-humidity environment), images in which two or more colors (especially red, blue, and green) are overlaid may come out faint. In this case, you may be able to improve the printout results by specifying [Special Settings 1].
- [Special Settings 2]:
When printing envelopes, the flaps may stick to the body of the envelopes depending on the type of the envelopes or the operating environment (especially in a high-humidity environment). In this case, you may be able to improve the printout results by specifying [Special Settings 2].
- [Special Settings 3]:
Depending on the paper type or the operating environment (especially in a high-humidity environment), thin lines or halftone areas may come out faint. In this case, you may be able to improve the printout results by specifying [Special Settings 3].
- [Special Settings 4]:
Depending on the paper type or the operating environment (especially in a low-humidity environment), smudge marks of spattering toner may appear around the text or patterns. In this case, you may be able to improve the printout results by specifying [Special Settings 4].
- [Special Settings 5]:
When coarse paper is used, the toner does not fix onto paper well, and the printed paper may come out faint. In this case, you may be able to improve the printout results by specifying [Special Settings 5].
- [Special Settings 6]:
Depending on the paper type or the operating environment (especially in a high-humidity environment), the printed paper may curl (the printed side may curl outward). In this case, you may be able to improve the printout results by specifying [Special Settings 6].
- [Special Settings 7]:
Depending on the paper type or the operating environment (especially in a high-humidity environment), the printed paper may curl (the non-printed side may curl outward). In this case, you may be able to improve the printout results by specifying [Special Settings 7].
- [Special Settings 8]:
If the printer has not printed for a long period of time, halftone areas may appear uneven. In this case, you may be able to improve the printout results by specifying [Special Settings 8].
- [Special Settings 9]:
When printing on paper with a glossy surface, toner may get on the non-printed areas. In this case, you may be able to improve the printout results by specifying [Special Settings 9].
- [Special Settings 10]:
Depending on the print data, outlines in the areas dense in color may be emphasized. In this case, you may be able to improve the printout results by specifying [Special Settings 10].
- [Service Settings]:
If you use the printer in a certain environment or use certain paper, the data may not be printed properly or result in deterioration in print quality. In this case, a service engineer may specify the print settings according to the operating environment or the paper. The settings specified by the service engineer are registered in [Service Settings]. Print with [Service Settings] specified, following the instructions of the service engineer.


