How to Install CARPS Driver via USB Connection (FAX-L380S)
Solution
The following is the installation procedure of the user software using a USB connection, under Windows 98/Me/2000/XP. The screen shots shown are from Windows 2000.
Before you install the software, make sure you do the following:
- Confirm the machine is not connected to your computer.
- Turn on the machine.
- Quit any Windows applications that are running on your computer.
IMPORTANT
a. Do not connect the USB cable to the port on your computer when you start the procedure. During the installation of the software, the installation program will prompt you when it is appropriate to connect the machine to your computer.
b. If you are using Windows 2000/XP, be sure to log on as a member of Administrators. The full control access right for the printer is necessary for the installation of CARPS.
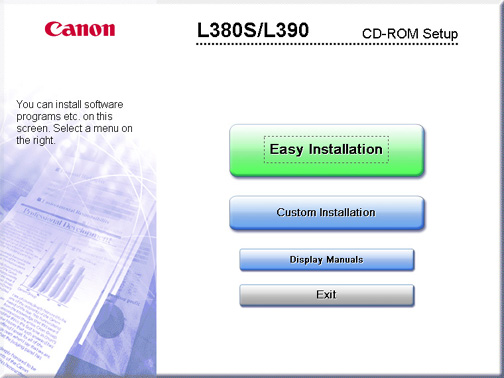
1. Place the CD-ROM into your CD-ROM drive.
The CD-ROM menu is displayed.
NOTE
If the L380S/L390 CD-ROM Setup screen is not displayed, double-click [My Computer] on the Windows desktop. Open the CD-ROM icon, then double-click [MInst (Minst.exe)].
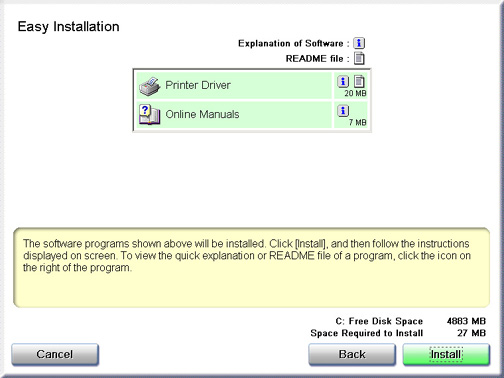
2. Click [Easy Installation] or [Custom Installaion].
NOTE
When you select [Easy Installation], Printer Driver and Online Manuals will be installed. If you do not want to install both items, select [Custom Installation], and select the item you want to install.
3. Click [Install].
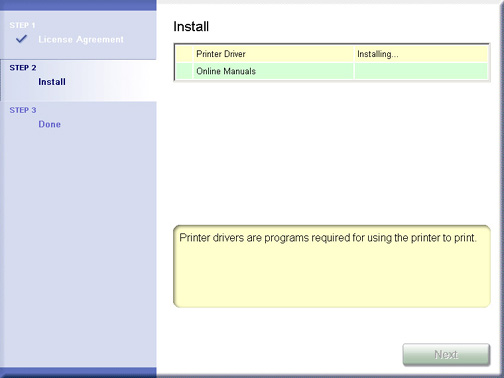
4. Read the contents of the [License Agreement] dialog box, and click [Yes].

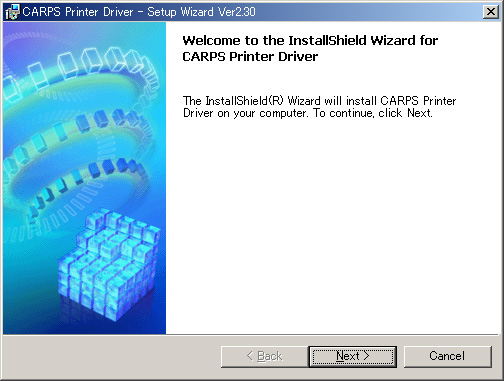
5. Click [Next] on the Setup Wizard dialog box.
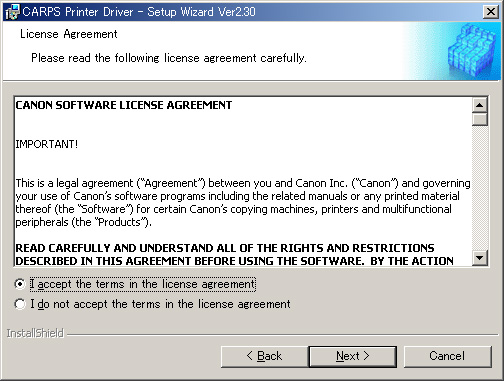
6. After confirming the contents of the [License Agreement] dialog box, select [I accept the terms in the license agreement], then click [Next].
7. Confirm that [Install Printer Driver through a USB Connection] is selected , then click [Next].
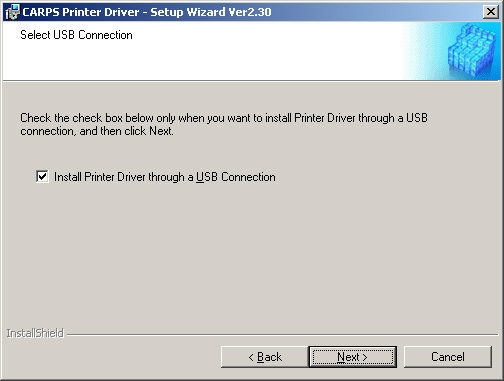
NOTE
A message recommending you to restart your computer may appear under some operating systems. In this case, continue installing after restarting your computer.
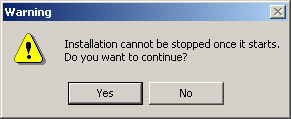
8. Click [Yes] to continue the installation through the USB connection.

9. Connect the machine to your computer with the USB cable.
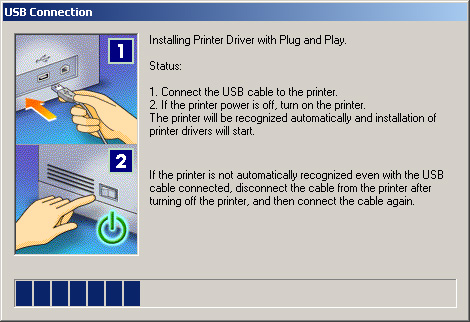
The printer driver is installed and the printer icon is added to the [Printers] folder.
IMPORTANT
The USB cable must be connected to the port on your computer within 60 seconds after [Yes] in the [USB Connection] dialog box is clicked, otherwise the installation will not complete.
IMPORTANT
While the printer driver is being installed, the message asking you if you want to view the README file or not appears. If you want to view the README file now, click [Yes]. If not, click [No].

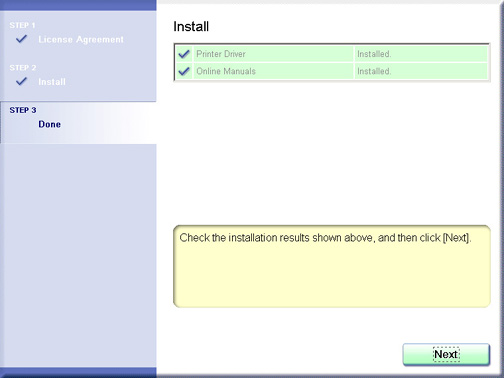
10. Click [Exit] , then click [Next].
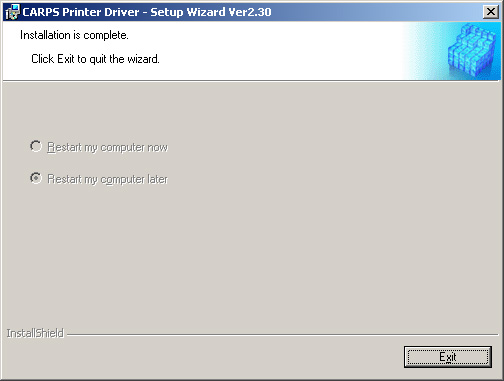
11. Check [Restart Computer Now (Recommended)], and click [Restart].
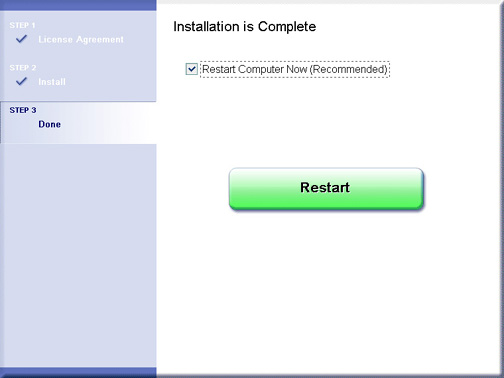
You can restart the computer later. In this case, clear [Restart Computer Now (Recommended)] and click [Exit].

