Solution
These instructions explain how to insert the date in images.
NOTE
- The date and time set in the camera are recorded in image files taken (as Exif information).
- Even if you shot images without using the Date Stamp function, you can insert and print the shooting date in images by using the Exif information and one of the following methods.
- Using a direct printer (PictBridge) to print.
- Using the included software (ZoomBrowser EX or ImageBrowser, etc.) to print.
- Using the DPOF print settings to have prints made at a photo developer's.
IMPORTANT
- The [Date Stamp] cannot be deleted from the image data once it has been recorded because the date is written in as an image.
- The following explanations are provided based on the assumption that the [Shooting Mode] is set to [Program] (
 ).
).
- When printing images that were taken with the [Date Stamp] function, be careful not to set the camera or printer to print the date to prevent the date from being printed twice.
- As the actual locations of buttons / switches on cameras vary depending on the camera model, the illustrations that appear on this page may differ from your camera.
Shooting modes in which the Date Stamp function can be used
1. Press the <Power> button on the camera.
2. Press the <

> button.
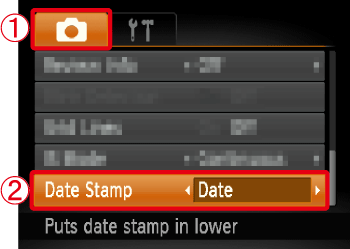
3. The following screen will appear on the LCD monitor.

Operate the <directional button> to select the [Shooting] (

) tab.

Operate the <directional button> to set [Date Stamp] to [Date] or [Date & Time].
After making these settings, press the <

> button.
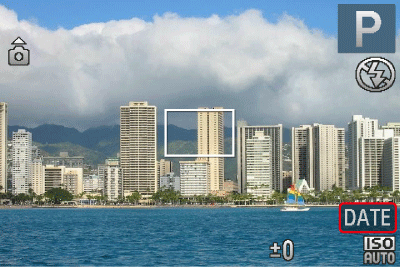
4. If you set [Date Stamp], [DATE] will appear on the LCD monitor.
If [DATE] does not appear, press the <

> button a few times to switch the screen display.
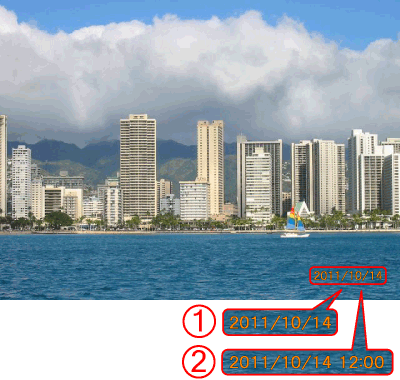
5. When shooting with this setting, the date will be embedded in the image as shown below.

[Date]

[Date & Time]
NOTE
- The date, its font and color, and the position where it is displayed cannot be changed. Also, dates and times recorded with [Date Stamp] cannot be deleted.
 ).
). > button.
 Operate the <directional button> to select the [Shooting] (
 ) tab.
 Operate the <directional button> to set [Date Stamp] to [Date] or [Date & Time].
 > button.
 > button a few times to switch the screen display.
 [Date]
 [Date & Time]
 ... The Date Stamp function can be used.
 ... The camera does not have this shooting mode.
 ,
,  ,
, 
 ,
, 


 ,
,  ,
,  ,
,  ,
,  ,
, 


