Solution
This section provides explanations about how to install PIXELA Transfer Utility and VideoBrowser.
IMPORTANT
Transfer Utility and VideoBrowser cannot be installed simultaneously.
If you want to use all of the functions, installing just VideoBrowser will enable you to use the functions of Transfer Utility as well.
Install Transfer Utility to your computer
1. Insert "PIXELA Transfer Utility" disc to the computer.
The installation screen will be displayed.
*Click [Continue] (Windows Vista) / [Yes] (Windows 7) if the [User Account Control] dialog box is displayed.
NOTE
If the installation screen is not displayed, open the disc drive window from the [My Computer] (Windows XP) / [Computer] (Windows Vista/Windows 7) in the [Start] menu, and double-click [setup.exe].
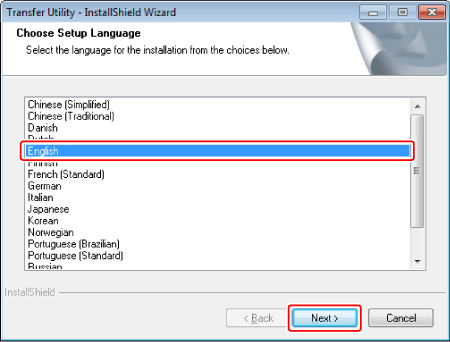
2. Select the language for the installation and click [Next].
4. Read the license agreement and select [I accept the terms of the license agreement].
Click [Next].
5. Check the destination folder for the installation files and click [Next].
If you want to change the destination folder, click [Change...] and specify the destination.
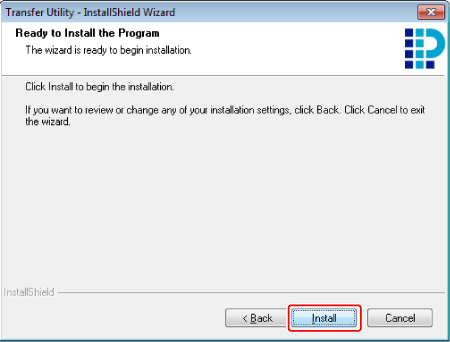
6. Click [ Install ] to begin the installation.
7. Once the installation is completed, click [ Finish ].
The installation of Transfer Utility is completed. The Software Guide is also installed and following shortcuts are placed on the Desktop.
- Transfer Utility (software)
- Transfer Utility Software Guide
- Transfer Utility Homepage
- PIXELA Product Registration
Install VideoBrowser to your computer
Before installing, connect to the Internet if available
CAUTION
If Internet connection is not available, call a PIXELA CORPORATION user support center and get the Certification code. Give the operator the serial number of your camcorder to get a certification code. Write down the certification code and have it ready to activate the software manually.
1. Insert "PIXELA VideoBrowser" disc to the computer.
The installation screen will be displayed.
*Click [Continue] (Windows Vista) / [Yes] (Windows 7) if the [User Account Control] dialog box is displayed.
NOTE
If the installation screen is not displayed, open the disc drive window from the [My Computer] (Windows XP) / [Computer] (Windows Vista/Windows 7) in the [Start] menu, and double-click [setup.exe].
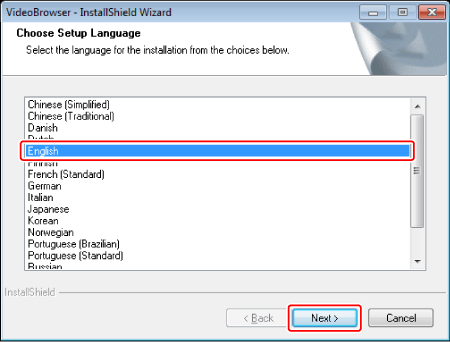
2. Select the language for the installation and click [Next].
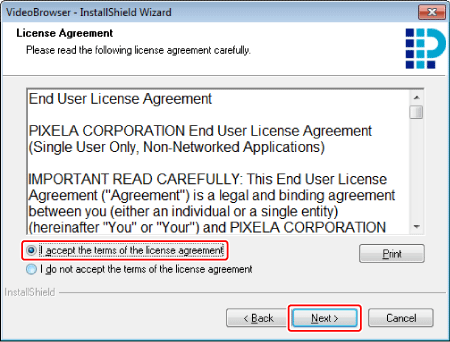
4. Read the license agreement and select [I accept the terms of the license agreement].
Click [Next].
5. Check the destination folder for the installation files and click [Next].
If you want to change the destination folder, click [Change...] and specify the destination.
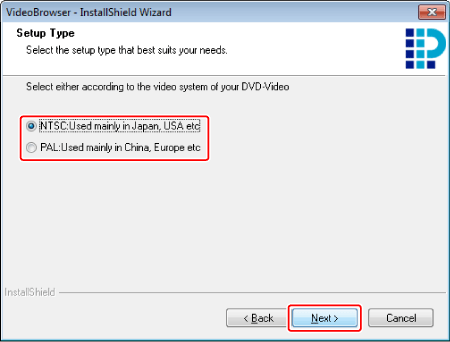
6. Select your local video system and click [Next].
*Change the video system in the Preferences if the video system set in this step is different from that of camcorder.
7. Enter the serial number of your camcorder and click [Next].
NOTE
If the message that the product activation failed appears...
The message will be displayed if your computer is not connected to the Internet.
If you have an Internet-accessible environment, click [OK] after accessing to the Internet.
Click [Cancel] if you do not have an Internet connection. The window to enter the certification code will be displayed. Contact PIXELA User Support Center and acquire the certification code then enter it.
*When using security software, the registration of the certification code may not be performed properly depending on the firewall settings. In the case, change the settings of the security software, or exit the security software and install VideoBrowser. Refer to the manual of the security software to change the settings.
8. Click [Install] to begin the installation.
Click [OK] when the message telling that the product activaiton has been finished successfully appears.
7. Once the installation is completed, click [ Finish ].
The installation of VideoBrowser is completed. The Software Guide is also installed and following shortcuts are placed on the Desktop.
- VideoBrowser (software)
- VideoBrowser Software Guide
- VideoBrowser Homepage
- PIXELA Product Registration
