12-Sep-2011
8200947700
 ].
]. ] (Address Book).
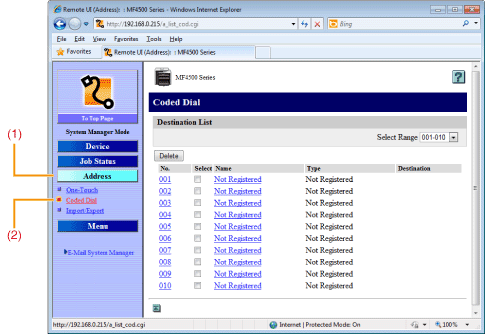
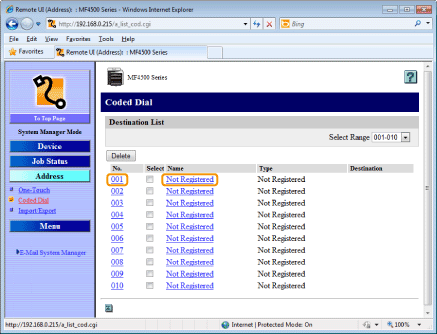
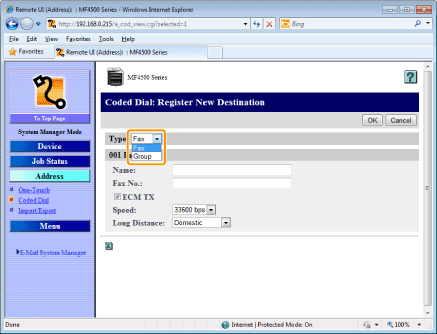
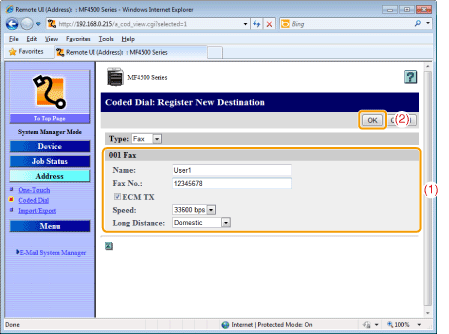
 Storing a coded dial code newly
 ].
]. ] or [
  ] to select <Register New Destination to Address Book>, and then press [OK].
 When the address book PIN is specified
 ] or [
  ] to select <Coded Dial>, and then press [OK].
 ] or [
  ] to select <Fax>, and then press [OK].
 ] or [
  ] to select <Name>, and then press [OK].

 ] or [
  ] to select <Apply>, and then press [OK].
 ] or [
  ] to select <Destination>, and then press [OK].

 ] or [
  ] to select <Apply>, and then press [OK].
 ] or [
  ] to select <Coded Dial>, and then press [OK].
 ] or [
  ] to select the number to be registered, and then press [OK].
 ] or [
  ] to select <Apply>, and then press [OK].
 Editing a coded dial code
 ].
].
 ] or [
  ] to select <Edit Address Book>, and then press [OK].
 When the address book PIN is specified
 ] or [
  ] to select a destination that you want to edit, and then press [OK].
 ] or [
  ] to select an item that you want to edit, and then press [OK].
 ] or [
  ] to select <Apply>, and then press [OK].
  ] or [
  ] to select <Apply>, and then press [OK].
 Deleting a coded dial code
 ].
].
 ] or [
  ] to select <Delete From Address Book>, and then press [OK].
 When the address book PIN is specified
 ] or [
  ] to select a destination that you want to delete, and then press [OK].
 ] to select <Yes>, and then press [OK].
 ] (Back) to close the menu screen.
 Storing a coded dial code newly
 Editing a coded dial code
 Deleting a coded dial code

