Solution
CAUTION
- In order to perform this operation, it is necessary to install [CameraWindow Ver8.3] from the CD-ROM (DIGITAL CAMERA Solution Disk) supplied with the product.
- In this section, [PowerShot S95] is used as an example to explain the operation. Depending on your model, the position of buttons, screen indications, and setting items may vary.
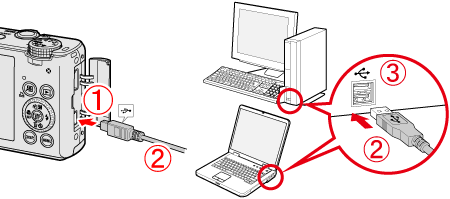
1. Connect the [DIGITAL Terminal] to the PC's USB terminal by using the [Interface Cable] that came with your camera.

Camera's [DIGITAL Terminal]

[Interface Cable]

PC's USB terminal
2. Press the <Power> button on the camera.
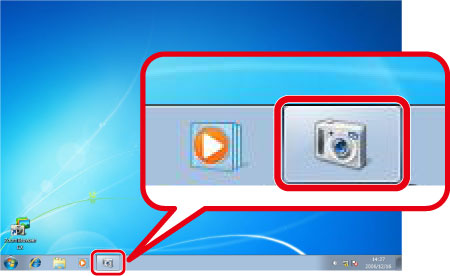
3. Click the (

) icon displayed in the [taskbar].
4. The following screen appears.
Double-click [Import pictures and videos] (

).
NOTE
If [Downloads Images From Canon Camera] (

) is already selected, proceed to Step 6.
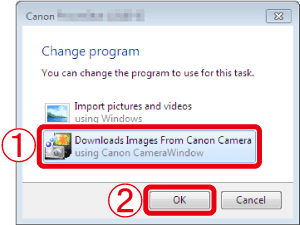
5. The following window appears.
Select

[Downloads Images From Canon Camera], and click

[OK].
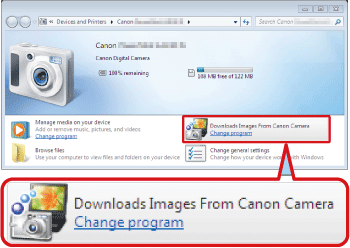
6. Now you are back to the following screen.
Double-click [Downloads Images From Canon Camera].
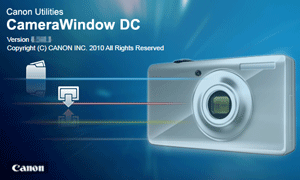
7. The following window appears.
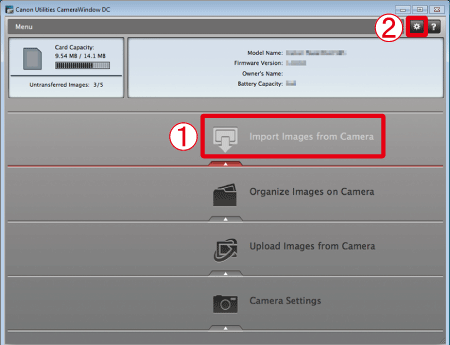
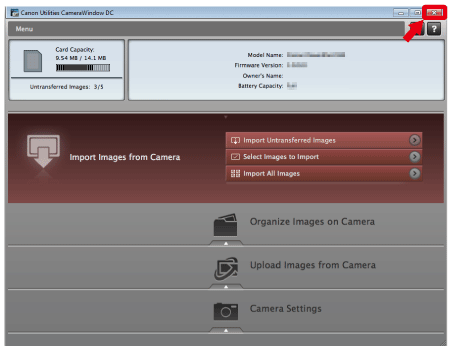
8. The [CameraWindow] menu appears. Click

[Import Images from Camera].
By default, the imported images will be saved separated by each shooting date in the picture folder.
If you want to change the folder to save transferred images, click

(

) on the upper-right side of the window, click [Import] > [Folder Settings], and then click [Browse] to change the setting.
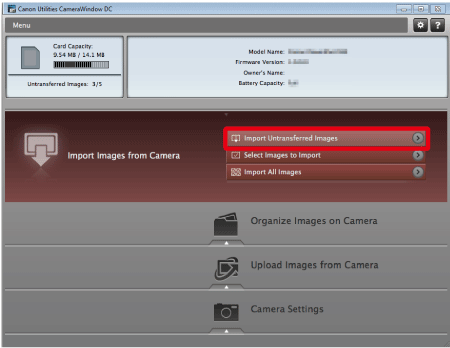
9. The following window appears, so click [Import Untransferred Images].
10. The following window appears, and the computer starts to transfer images from the camera.
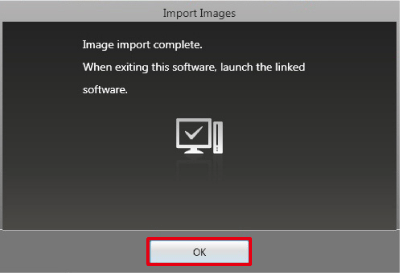
12. The following window appears.
Click the (

) button to close this window.
A related application ([ImageBrowser] by default) will start automatically and the imported images are displayed.
 Camera's [DIGITAL Terminal]
 [Interface Cable]
 PC's USB terminal
 ) icon displayed in the [taskbar].

 ).
). ) is already selected, proceed to Step 6.
 [Downloads Images From Canon Camera], and click
  [OK].
[OK].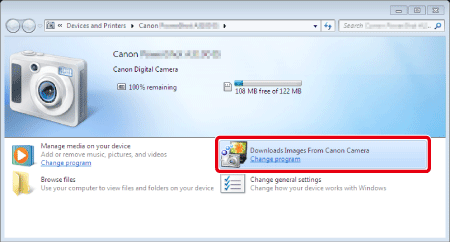
 [Import Images from Camera].
 (
( ) on the upper-right side of the window, click [Import] > [Folder Settings], and then click [Browse] to change the setting.

 ) button to close this window.