Solution
This section describes how to shoot and play back movies.
CAUTION
- In this section, [PowerShot A3100 IS] is used as an example to explain the operations. Depending on your model, the position of buttons, screen indications, and setting items may vary.
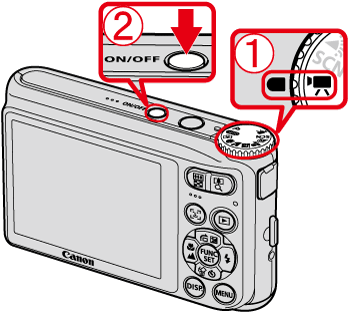
1. Set the [Shooting Mode] to

<Movie> (

), and then press

the <Power> button of the camera.
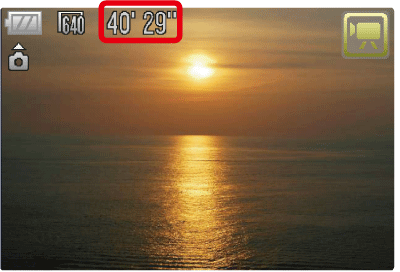
2. The following screen appears.
The maximum shooting duration appears on the [LCD Monitor].
If it does not appear, press the <DISP.> button (

) several times.
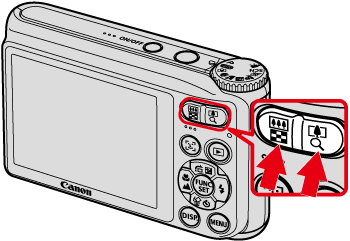
3. Hold the camera facing the subject, and press the <Zoom Button> to decide the size at which you want to capture the subject.
CAUTION
The optical zoom cannot be used during movie-recording. You can use the digital zoom, but images may appear coarse.
For details, please refer to the following page.
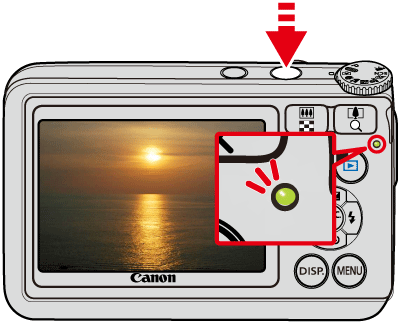
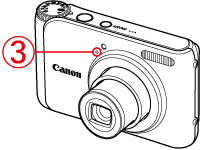
4. Press the <Shutter Button> halfway to focus.
When the camera focuses, it beeps twice, and the indicator lights in green.
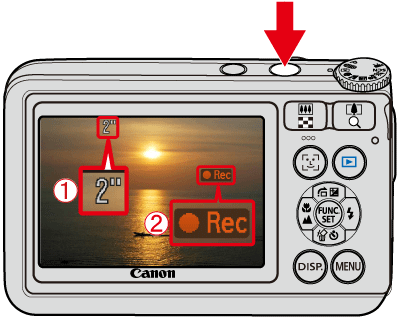
5. Press the <Shutter Button> fully to start shooting.
When the camera starts shooting,

[Elapsed Time] and

[Rec] appear on the [LCD Monitor].
Once shooting begins, take your finger off the <Shutter Button>.
If you change the composition of your shot during shooting, the focus will stay the
same, but the brightness and tone will automatically adjust.
CAUTION
- Do not touch
 the <Microphone> during shooting.
- Please note that the sounds of camera operation are also recorded during shooting.
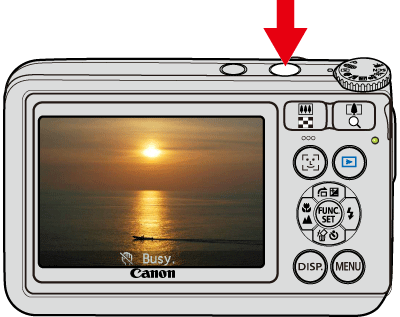
6. Press the <Shutter Button> fully again to stop shooting.
The camera beeps once and stops shooting.
The indicator blinks in green, and the movie is recorded to the memory card.
NOTE
- Shooting will automatically stop when the memory card is full.
- Recording will automatically stop when either the clip file size reaches 4 GB or the recording time reaches approximately 1 hour.
- Recording may stop even if the maximum clip length has not been reached on some memory cards. SD Speed Class 4 or higher memory cards are recommended.
For the details on the approximate length of movies that can be recorded on a memory card, please refer to the following page.
How many images can I record on a memory card?
7. Press the <Playback> (

) button.
8. The last image you shot appears.

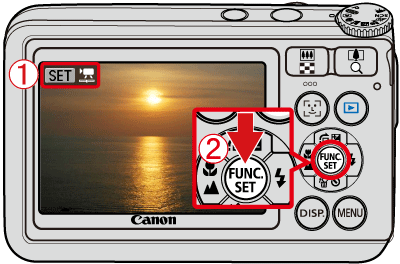
(

) appears on the movies.
To select a movie, operate the <directional buttons> left or right to display the movie that you want to play back.
Press

the <FUNC./SET> (

) button.
Operate the <directional buttons> left or right to select

[Play] (

).
Operate the <directional buttons> up or down to adjust

the sound volume.
Press

the <FUNC./SET> (

) button to play back the movie.
Press the <FUNC./SET> (

) button again to pause the movie.
NOTE
- You can adjust the sound volume even while a movie is being played back by operating the <directional buttons> up or down.
- You can use your computer to play back movies. For details, please refer to the following pages.
 <Movie> (
 ), and then press
  the <Power> button of the camera.
 ) several times.
 [Elapsed Time] and
  [Rec] appear on the [LCD Monitor].
 the <Microphone> during shooting.
 ) button.
 (
( ) appears on the movies.
 the <FUNC./SET> (
 ) button.
 [Play] (
 ).
). the sound volume.
 the <FUNC./SET> (
 ) button to play back the movie.
 ) button again to pause the movie.