Solution
You can resize an image from its original pixel setting to a lower pixel setting and save the resized image as a separate file.
CAUTION
- As the actual locations of buttons / switches on cameras vary depending on the camera model, the illustrations that appear on this page may differ from your camera.
- Screens or menu listings may differ depending on the camera model being used.
- You cannot resize an image to a larger size.
- Images indicated by (
 ), and (
 ), and movies indicated by (
 ) cannot be resized.
- The resized image will be saved in a new file. The original image will remain.
- If there is limited capacity on the memory card, then resizing cannot be performed.
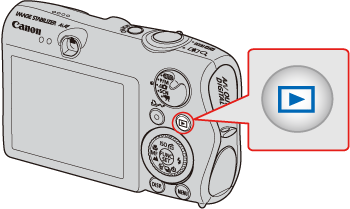
1. Press the <Playback> button to turn on the camera.
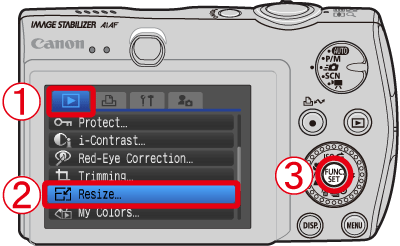
2. Press the <MENU> button.
3. The following screen appears on the LCD monitor.

Operate the <directional buttons> left or right to select the [Playback] (

) tab.

Operate the <directional buttons> up or down to select [Resize].

Press the <FUNC./SET> (

) button.
4. The following screen appears.
Operate the <directional buttons> left or right to display the image you want to resize.
When the image you want to resize appears, press the <FUNC./SET> (

) button.
5. The following screen appears.

Operate the <directional buttons> left or right to select the resolution you want to resize, and then

the resolution after resizing will appear.
After you select the resolution you want to resize, press the <FUNC./SET> (

) button.
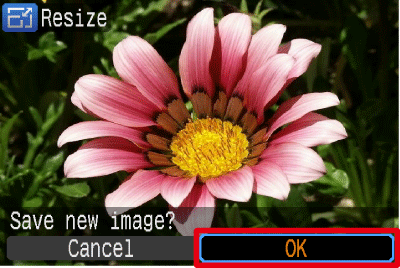
6. The following screen appears.
Select [OK], and then press the <FUNC./SET> (

) button.
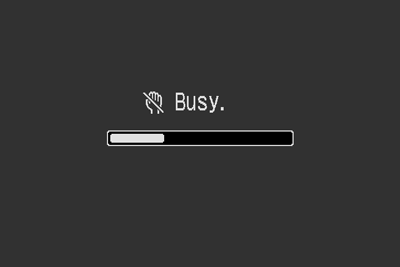
7. The following screen appears, and resizing will start.
8. When resizing is completed, the screen for selecting images will reappear.
If you wish to continue resizing of another image, repeat operations from Step 4.
9. Press the <MENU> (

) button to check the resized image.
Select [Yes], and then press the <FUNC./SET> (

) button.
10. The following screen appears.
Confirm that the icon (

) is displayed in the lower-left corner of the screen to indicate the resolution after resizing, and that the image has been edited.
If the icon does not appear, press the <DISP.> (

) button several times to display the icon.
 ), and (
 ), and movies indicated by (
 ) cannot be resized.


 Operate the <directional buttons> left or right to select the [Playback] (
 ) tab.
 Operate the <directional buttons> up or down to select [Resize].
 Press the <FUNC./SET> (
 ) button.
 ) button.
 Operate the <directional buttons> left or right to select the resolution you want to resize, and then
  the resolution after resizing will appear.
 ) button.
 ) button.

 ) button to check the resized image.
 ) button.
 ) is displayed in the lower-left corner of the screen to indicate the resolution after resizing, and that the image has been edited.
 ) button several times to display the icon.