How do I crop / trim images using ZoomBrowser?
11-Dec-2008
8200410400
Solution
CAUTION
- [ZoomBrowser EX] from the supplied Solution Disk must be installed on your computer for this operation.
- Operations for Windows Vista are explained here. Images displayed or operation might differ slightly in Windows XP.
- RAW images or movies cannot be trimmed.
1. Double-click the [ZoomBrowser EX] shortcut icon on your desktop to start ZoomBrowser EX.

If you cannot find the [ZoomBrowser EX] shortcut icon on your desktop, click [Start] ( ) > [All Programs] or [Programs] > [Canon Utilities] > [ZoomBrowser EX] and select [ZoomBrowser EX] to start ZoomBrowser EX.
 ) > [All Programs] or [Programs] > [Canon Utilities] > [ZoomBrowser EX] and select [ZoomBrowser EX] to start ZoomBrowser EX.
2. The following screen appears.
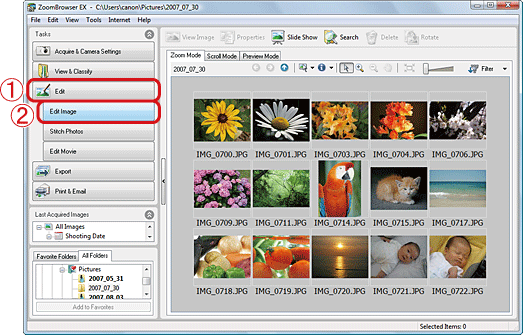
 Click [Edit].
 Click [Edit Image].
3. The following screen appears.
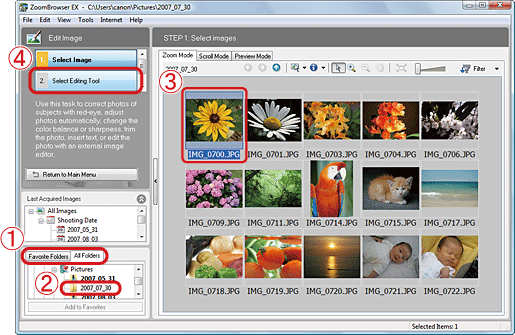
 Click either the [Favorite Folders] tab or the [All Folders] tab.
 Select the folder that contains the images to trim (Usually images are saved in the [Pictures] or [My Pictures]).
 Click the image to trim.
 Click [Select Editing Tool].
4. The following screen appears.
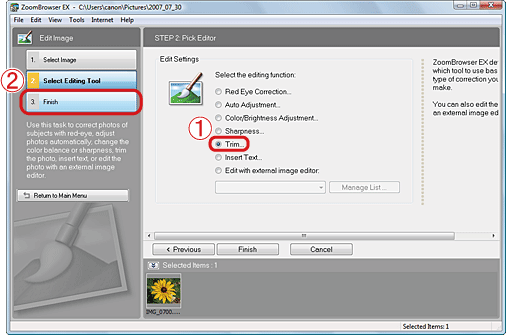
 Select [Trim].
 Click [Finish].
5. The trim area will be displayed on the [Trim Image] screen.
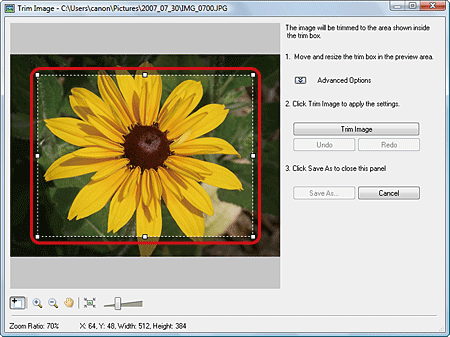
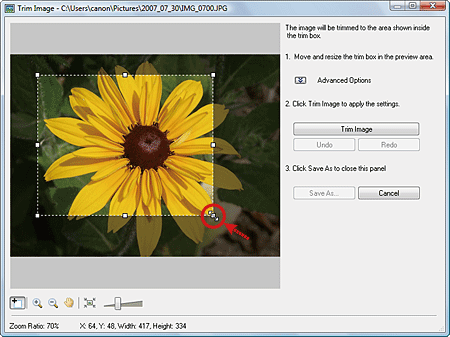
6. To change the trim area, select one of the selection handles ( ) on the trim area and drag it while holding the left mouse button down.
 ) on the trim area and drag it while holding the left mouse button down.
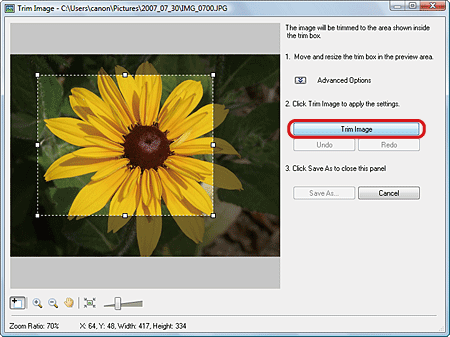
7. When you decide the trim area, click [Trim Image].
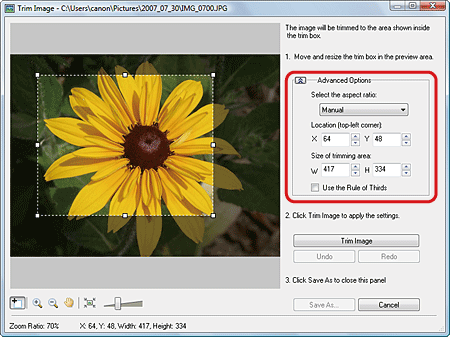
If you click [Advanced Options], you can specify the trim area using specific values and set the aspect ratio.
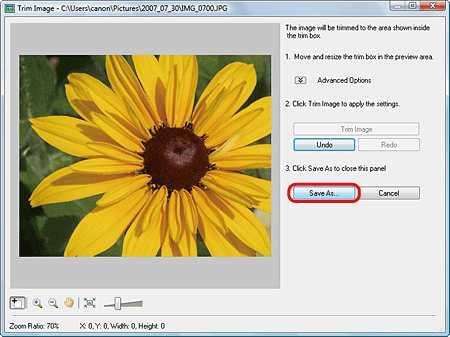
8. Click [Save As].
9. The following screen appears.

 Check the destination where the file will be saved.
 Click (
 ) to change the destination and select a new one.
 Name the file (If you don't change the file name, the original image will be overwritten).
 Set the image quality as desired.
 Click [Save] to save the image.