Solution
These instructions explain how to insert the date in images.
CAUTION
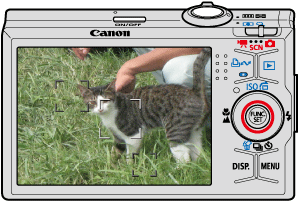
- To select the items displayed on camera's LCD monitor,
 press the button shown below (right, left, up, and down). To specify the selected item,
  press the button.
- The [Date Stamp] cannot be deleted from the image data once it has been recorded because the date is written in as an image.
- When selecting [Date Stamp] , [Recording Pixels] is set to 1600 x 1200 pixels and the compression (image quality) to [Fine].
- Screens or menu listings may differ depending on the camera model being used.
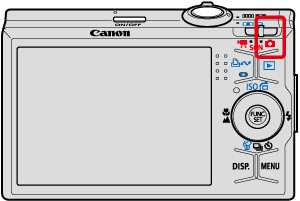
1. Set the <Mode Switch> to <Shooting> (

) and then press the <Power> button.
2. Press the <FUNC./SET> (

) button.
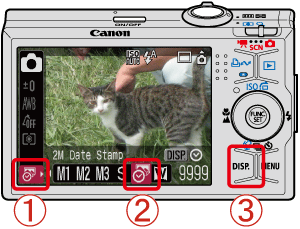
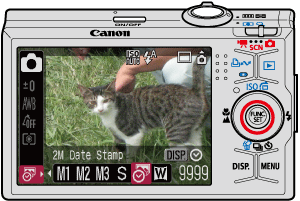
3. A screen like the one below will appear on the monitor.
Select

[Date Stamp] (

) in the [Recording Pixels] section

.

Press the <DISP.> (

) button.
4. A screen like the one below will appear on the monitor.

Press the camera button as shown above (right and left), select [Date Stamp] and set it to [Date] or [Date & Time].

Select the <DISP.> (

) button.
5. Press the <FUNC./SET> (

) button.
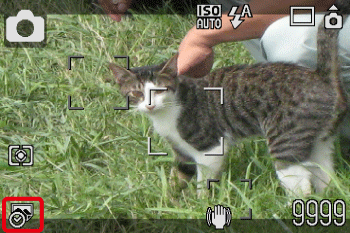
6. A screen like the one below will appear on the monitor, so confirm that [Date Stamp] (

) is set.
7. When shooting with this setting, the date will be embedded in the image as shown below.

[Date]

[Date & Time]
WARNING
The date, its font and color, and the position where it is displayed cannot be changed. Also, dates and times recorded with [Date Stamp] cannot be deleted.
 press the button shown below (right, left, up, and down). To specify the selected item,
  press the button.
 ) and then press the <Power> button.
 ) button.
 [Date Stamp] (
 ) in the [Recording Pixels] section
  .
. Press the <DISP.> (
 ) button.
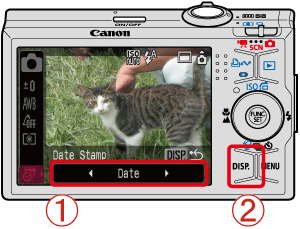
 Press the camera button as shown above (right and left), select [Date Stamp] and set it to [Date] or [Date & Time].
 Select the <DISP.> (
 ) button.
 ) button.
 ) is set.

 [Date]
 [Date & Time]