Solution
Removing the Paper Feeder
IMPORTANT
When moving or servicing the printer, remove the paper feeder and paper cassette.
2. If a USB cable is connected, turn the computer off, and then disconnect the USB cable.
3. Disconnect the power plug from the AC power outlet.
4. Remove all the interface cables and the power cord from the printer.
5. Pull out the paper cassettes from the printer and paper feeder.
6. Remove the four metal fittings and four screws.
Remove the screws by turning them reversely to when installing them.
IMPORTANT
You will need the removed screws when you install the paper feeder again. Be sure not to misplace them.
7. Lift the printer unit and remove it from the paper feeder.
Installing the Paper Feeder
1. Gently set down the printer unit while matching the positioning pins (A) on the paper feeder.
2. Fix the printer unit and paper feeder with the two metal fittings and two screws.
Hook the holes (A) of the metal fittings onto the hooks (B) on the printer (1), and then secure them with the screws (2).
Hook the tabs (A) of the metal fittings in the holes (B) on the printer (3), and then secure them with the screws (4).
3. Set the paper cassette in the printer unit and paper feeder.
4. Connect the interface cables except for the USB cable, and connect the power cord.
5. Plug the power plug into the AC power outlet.
6. Connect the USB cable.
NOTE
After installing the paper feeder, you have to specify the settings for the optional accessories in the [Device Settings] sheet in the printer driver. You can obtain the status of the optional accessories automatically by clicking [Get Device Status] in the [Device Settings] sheet.
If you cannot obtain the status of the optional accessories of the printer automatically, select the installed optional accessories from [Paper Source Options].
Precautions on Reinstalling the Paper Feeder
IMPORTANT
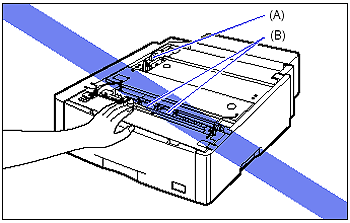
- Do not touch the connector (A) or feed rollers (B) in the paper feeder. This may result in damage to the printer or misfeeds.
- The paper cassette cannot be pulled out horizontally. If you try to pull it out forcefully, this may result in damage to the paper cassette.
- Make sure that the front cover and multi-purpose tray are closed before carrying the printer.
- If the paper feeders are installed, make sure that the paper cassette of the paper feeder (Cassette 2, Cassette 3, or Cassette 4) to feed and paper cassettes upper than the feeding paper feeder are set before using the printer. If those paper cassettes are not set, paper cannot be fed from the lower paper source. (For example, if Cassette 2 is not set, paper cannot be fed from Cassette 3.)
- If there is any packing material remaining inside the paper feeder, this may result in misfeeds or damage to the printer when operating the printer. Be sure to remove all the packing materials following the procedure.
- The removed packing materials are required when transporting the printer for relocation or maintenance. Keep them where they will not get lost.
- Because the paper cassette is heavy, hold it with your both hands securely.
- Place the removed paper cassette on an even and stable surface.
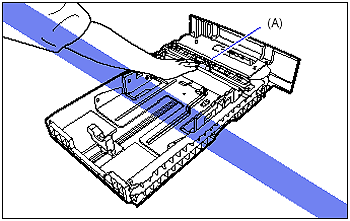
- Do not touch the feed roller (A) in the paper cassette. This may result in misfeeds.
NOTE
The packing materials may be changed in form or position to be placed, or may be added or removed without notice.


