Cleaning the Fixing Roller
18-Nov-2011
8100115700
Solution
When the front or back of the printed paper has smudge marks, clean the fixing roller using the following procedure. Print quality deterioration can be prevented by cleaning the fixing roller.
IMPORTANT
- The cleaning paper cannot be printed on any paper other than A4/Letter. Be sure to use A4/Letter size paper.
- To print a cleaning paper, load a sheet of A4/Letter size paper in the multi-purpose tray.
1. Make sure that the printer is online.
If the printer is not online, press [Online].
2. Press [Utility].

3. Select CLEANING using [  ] and [
  ], then press [OK].
 ] and [
  ], then press [OK].
4. Select the size of the cleaning paper using [  ] and [
  ], then press [OK].
 ] and [
  ], then press [OK].
<CLEANING PAPER> appears in the display, and the printer waits to print the cleaning paper.
5. Load a sheet of A4/Letter size paper in the multi-purpose tray, then press [Online].

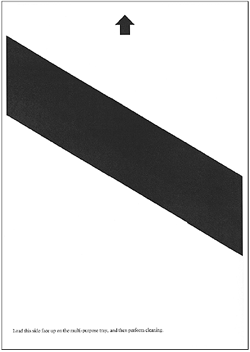
The cleaning paper is printed.

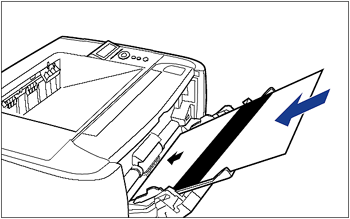
6. If any paper is loaded in the multi-purpose tray, remove it.
7. Load the cleaning page with the printed side facing up and the arrow mark going into the multi-purpose tray first.

8. Press [Online].

The paper is fed into the printer slowly, and the printer starts cleaning the fixing roller.
NOTE
- Cleaning takes approximately 80 seconds.
- The cleaning process cannot be canceled. Please wait until it is completed.
- When the front or back of the printed paper has smudge marks even after performing the procedure above, perform the cleaning again. When doing so, do not use the cleaning paper output in Step 5 above but load A4/Letter size blank paper in the multi-purpose tray, and then perform the cleaning.