Solution
Checking the Inside of the Printer
1. If you are using the multi-purpose tray, close it.
2. Open the front cover.
While pressing the open button on the top of the front cover (1), open it gently (2).
3. Remove the toner cartridge from the printer.
4. Check the inside of the printer.
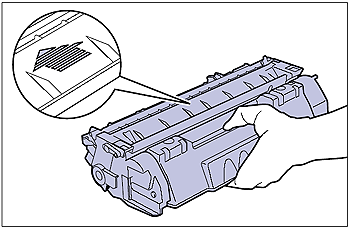
5. Hold the toner cartridge properly with the arrowed side facing up as shown in the figure.
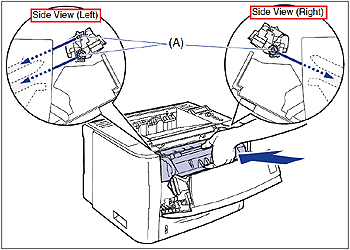
6. Install the toner cartridge.
Push the toner cartridge into the printer firmly until it touches the back of the printer while aligning (A) on both sides of the toner cartridge with the toner cartridge guides inside the printer.
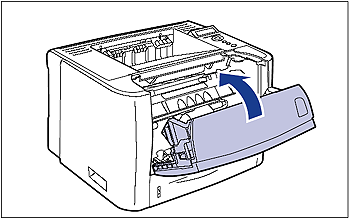
7. Close the front cover.
Close the front cover gently and firmly.
Precautions on Checking the Inside of the Printer
IMPORTANT
- Do not touch the high-voltage contact (A) or the electrical contacts (B) shown in the figure, as this may result in damage to the printer.
- If you cannot close the front cover, make sure that the toner cartridge is installed properly. If you try to close the front cover forcefully, this may result in damage to the printer or toner cartridge.
- Do not leave the front cover open for a long time after installing the toner cartridge. This may result in deterioration in print quality.
NOTE


