Solution
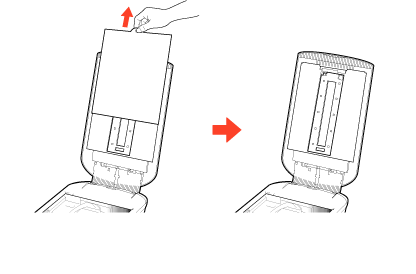
1. Remove the protective sheet from the document cover.
Slide the protective sheet up to remove it.
When you finish scanning, put the protective sheet back by aligning it with the grooves in the document
cover and sliding it downward into place.
IMPORTANT
- Store the protective sheet in a safe place so that it will not get lost.
- Always put the protective sheet back when you are not scanning film to protect the light source in the document cover.
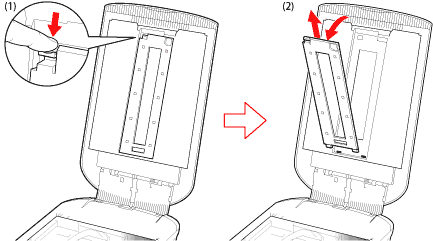
2. Open the document cover and remove the film guide.
Hold the document cover so that it doesn't close, then (1) press down and hold the lever at the film guide's top left and (2) tilt the film guide outward and lift it up.
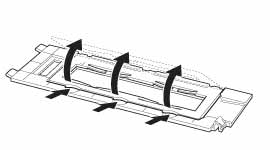
3. Insert a fingernail into the slot in the Film Guide and open the Film Holder.
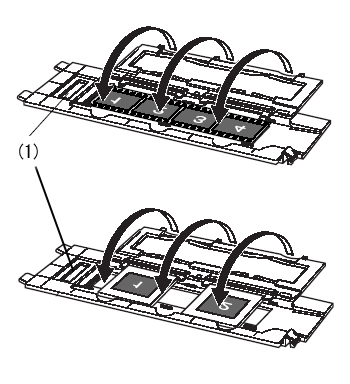
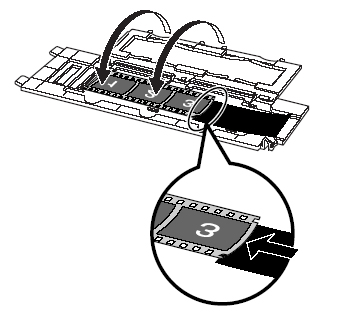
4. Insert the film into the Film Guide.
Place the film face down with the frames in reverse order. Close the film holder.
IMPORTANT
- Hold the film by the edges with your fingertips to avoid getting fingerprints or dirt on the film surface.
- Use a blower brush to remove any dust from the film, document glass or light source unit.
- Do not block the calibration slot (1) on the Film Guide when you are scanning film. Colors will not be scanned correctly if the calibration slot is obstructed.
When curled film is scanned, extra light will enter through any gaps and produce bands of color around the edges of the scanned image. If this occurs, use the supplied shield to hold down the film and block the light as shown in the figure.
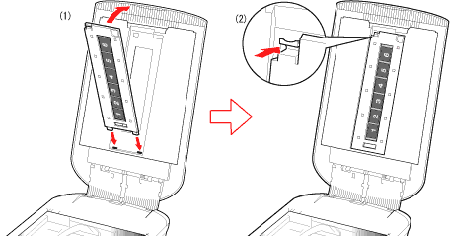
6. Set the Film Guide to the document cover.
Hold the document cover and insert the bottom edge of the Film Guide into the bottom groove in the
document cover (1), and then tilt the top of the Film Guide up into the document cover until it locks securely into place with a click (2).
7. Close the document cover.
