• Our Customer Care Centre will be closed earlier at 12pm, on 24 December 2024. Usual operating hours will resume on 26 December 2024. We apologise for any inconvenience caused.

    Uninstalling the Printer Driver

    22-Nov-2007
    8000791801

    Category : Software Installation/Uninstallation
    Description : Uninstalling the Printer Driver
    Uninstalling the Printer Driver (Mac OS X)


    This section describes how to uninstall the printer driver from your Macintosh.
    (Uninstallation is an operation to remove a driver or other item of software when it is no longer needed, or if a problem occurs.)
    Note that once you uninstall the printer driver, you will not be able to use the printer to print images. Please make sure to handle this carefully.

    Note:
    -
    The following instructions are intended for Mac OS X (v10.4). The screens and operations may differ slightly in Mac OS X (v10.2 and v10.3).
    -
    Please be sure to follow the following instructions to uninstall the driver. If you don’t follow the instructions, the printer driver may not be uninstalled correctly and you may not be able to reinstall the driver.


    1. Quit all running applications.


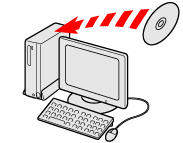
    2. Load the [Compact Photo Printer Solution Disk] CD-ROM supplied with your printer into the CD-ROM drive.


    3. Double-click the CD-ROM icon that appears on the desktop.


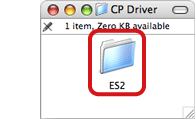
    4. The following screen will appear, so double-click [CP Driver].


    5. The following screen will appear, so double-click either the [ES2] folder or the [ES20] folder.


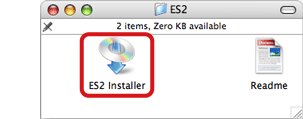
    6. The following screen will appear, so double-click either [ES2 Installer] or [ES20 Installer].


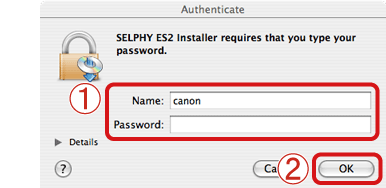
    7. If the following screen appears, enter the name and password set for your Macintosh.


    Enter your [Name] and [Password].
    Click [OK].


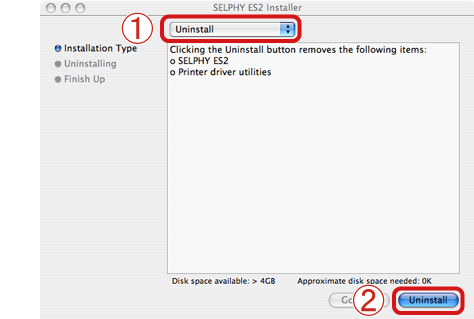
    8. The following screen appears.
     
    Select [Uninstall].
    Click [Uninstall].


    9. If the following screen appears, click [Continue].


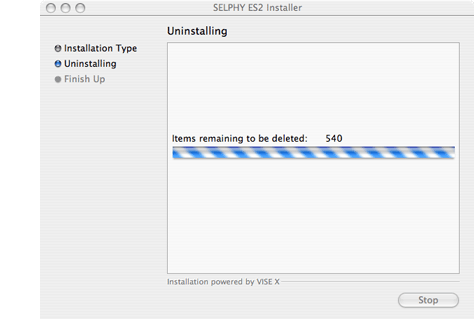
    10. The following screen appears, and uninstallation starts.


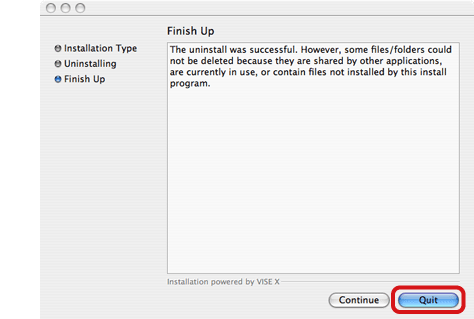
    11. The following screen will appear, so click [Quit].


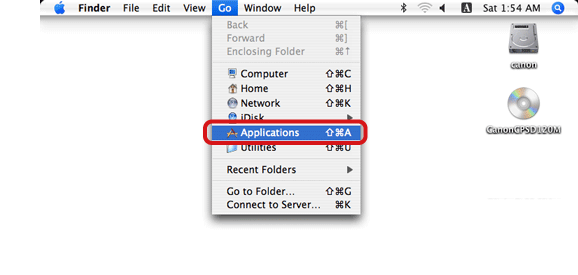
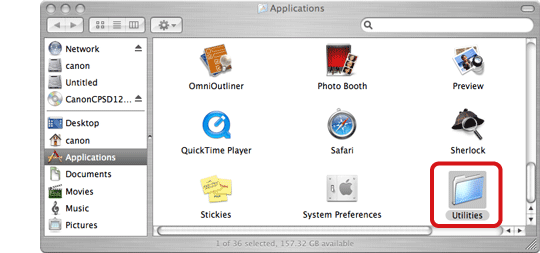
    12. From the [Go] menu, select [Applications].


    13. The screen below will appear, so double-click [Utilities].


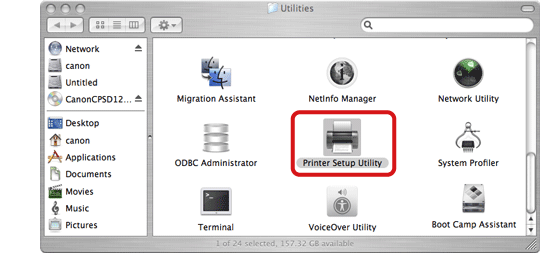
    14. The screen below will appear, so double-click [Printer Setup Utility].


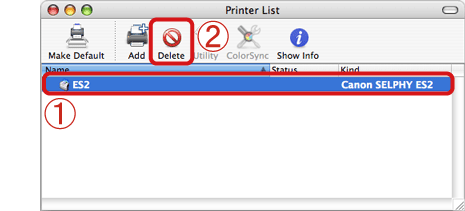
    15. The following screen appears.

    Select the printer you want to delete.
    Click [Delete].


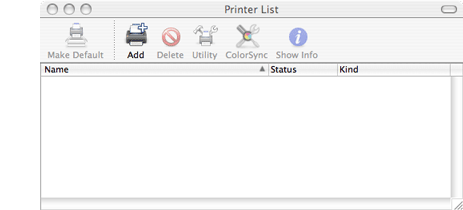
    16. After confirming that the printer does not appear here, close this window.


    This completes the process of uninstalling the printer driver.