


Adding a Date Stamp when Shooting (PowerShot SX60 HS)
Solution
The camera can add the shooting date to images, in the lower-right corner.
IMPORTANT
- Note that date stamps cannot be edited or removed, so confirm beforehand that the date and time are correct.
NOTE
- For setting or changing the date and time, please click here.
- In some shooting modes it may not be possible to configure the [Date Stamp] setting.
The procedure for adding a date stamp to images during shooting is explained below.
1. Press the <Power> button to turn the camera on.
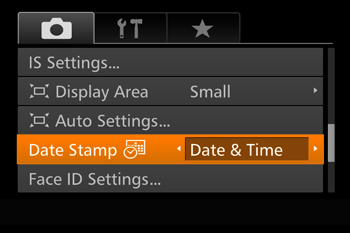
2. Press the <MENU> button, and choose the [Shooting] ( ) tab.
) tab.3. Press the < > or <
 > to select [Date Stamp], and then press the <
 ><
>< > to choose [Date] or [Date & Time].
> or <> to select [Date Stamp], and then press the <><> to choose [Date] or [Date & Time].Press the <MENU> button to complete the setting.
4. When [Date Stamp] is set to [Date] or [Date & Time], [  ] is displayed on the LCD monitor.
] is displayed on the LCD monitor. 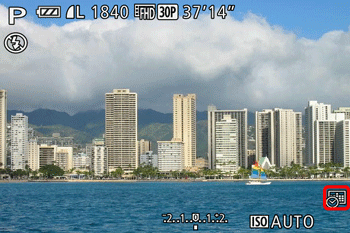
5. The [Date Stamp] will be added to the images as shown below:
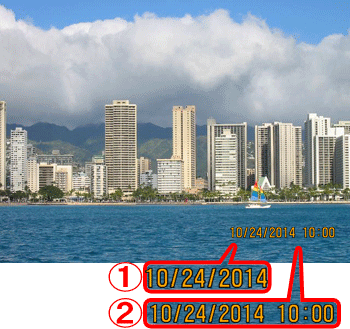
 [Date]
 [Date & Time]
NOTE
It is not possible to edit the displayed date, color, style, or position of date stamps.
- Shooting modes in which the [Date Stamp] setting can be configured are shown below.
| Model | Shooting modes in which the [Date Stamp] setting can be configured |
|---|---|
| PowerShot SX60 HS |  *, *,  *, *,  , ,  , ,  , ,  , ,  , ,  , ,  , ,  , ,  , ,  , ,  , ,  , ,  |