Basic Methods for Sending E-Mails/I-Faxes
Solution
This section describes the flow of sending e-mails/I-faxes.
For information on the required settings to be made beforehand, refer to the related information.
NOTE
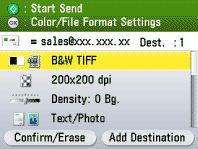
- If you select a file format for color from the <Color/File Format Settings> when sending e-mails, you will not be able to consecutively scan multiple-page originals from the platen glass. If you want to consecutively scan multiple-page originals using a file format for color, use the feeder instead.
- The following conditions are always selected when sending I-faxes:
- Paper Size: A4
This is because the sender does not know whether the recipient's machine can receive sizes other than A4. Originals larger than A4 are reduced to A4 size.
- File Format: TIFF
- Resolution: B&W 200 x 100 dpi or B&W 200 x 200 dpi
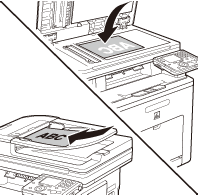
1. Place your originals.
2. Press  (Main Menu).
 (Main Menu).
3. Use [  ] , [
] , [  ] or
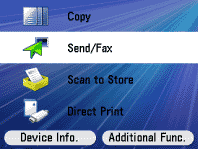
] or  (Scroll Wheel) to select <Send/Fax>, then press [OK].
 ] , [
] , [  ] or
] or  (Scroll Wheel) to select <Send/Fax>, then press [OK].
4. Use [  ] , [
] , [  ] or
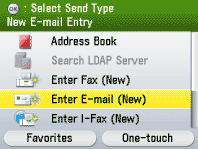
] or  (Scroll Wheel) to select <Enter E-mail (New)> or <Enter I-Fax (New)>, then press [OK].
 ] , [
] , [  ] or
] or  (Scroll Wheel) to select <Enter E-mail (New)> or <Enter I-Fax (New)>, then press [OK].
NOTE
You can specify the address using the Address Book or One-touch registered beforehand. For instructions on how to register the Address Book and One-touch, refer to the related information.
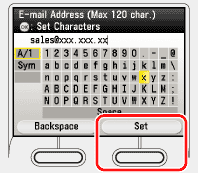
5. Use the software keyboard to enter the e-mail address or the I-fax address, then press the right Any key to select <Set>.
You can enter up to 120 characters for the e-mail address or the I-fax address.
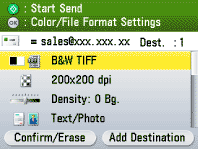
6. Make the scan settings you require.
7. Press  (Start).
 (Start).
- Scanning starts if the original is placed in the feeder, and the scanned data is sent to the specified destination when scanning is complete.
- To cancel scanning, press the left Any key to select <Cancel> or press
 (Stop).
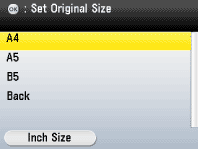
8. Use [  ] , [
] , [  ] or
] or  (Scroll Wheel) to select the original size, then press [OK].
 ] , [
] , [  ] or
] or  (Scroll Wheel) to select the original size, then press [OK].
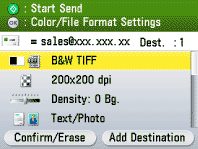
9. Press  (Start).
 (Start).
- Scanning starts.
- To cancel scanning, press the left Any key to select <Cancel> or press
 (Stop).
10. Follow the instructions on the display, then press  (Start) once for each original.
 (Start) once for each original.
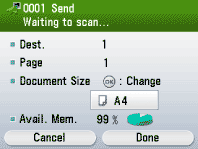
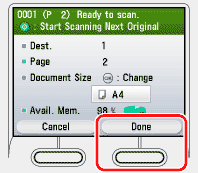
11. When scanning is complete, press the right Any key to select <Done>.
The scanned data is sent to the specified destination.
