


Setting the Date and Time
Solution
This section describes how to make the date and time settings on the camera.
CAUTION
- The date and time settings are recorded on images captured with the camera.
When you turn on the camera for the first time after purchase, the [Date/time] settings screen appears.
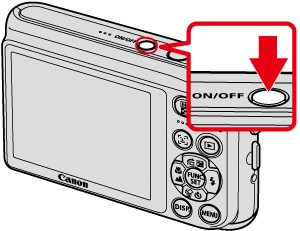
1. Press the <Power> button on the camera.
2. The following screen appears.
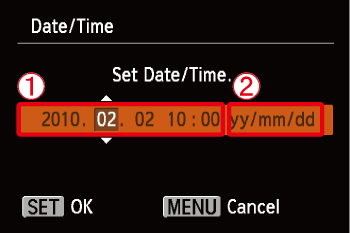
Operate the <directional buttons> left or right to select an option.
Next, operate the <directional buttons> up or down to make the following settings.
 Set the year, month, date, and time.
 Change the year, month, and date.
After the settings are completed, press the <FUNC./SET> ( ) button.
) button.1. Press the <Power> button on the camera.
2. Press the <MENU> ( ) button.
) button.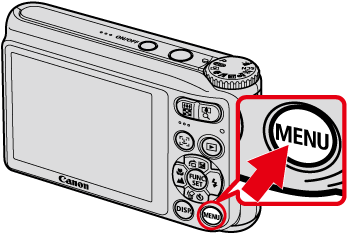
3. The following screen appears.
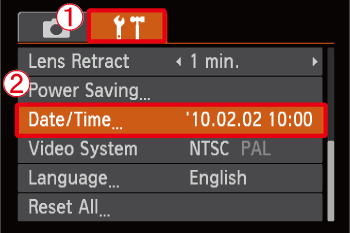
Operate the <directional buttons> left or right to select [Set up] ( ) tab.
[Set up] () tab.Operate the <directional buttons> up or down to select [Date/time].
[Date/time].Press the <FUNC./SET> () button.
) button.4. The following screen appears.
Operate the <directional buttons> left or right to select an option.
Next, operate the <directional buttons> up or down to make the following settings.
Set the year, month, date, and time. Change the year, month, and date.After the settings are completed, press the <FUNC./SET> () button.
) button.NOTE
- If you do not set the date and time, the [Date/time] settings screen appears every time you turn on the camera.