


How do I shoot still photos remotely in Live View using EOS Utility (EOS 5D Mark II)
Solution
You can operate your camera remotely from EOS Utility and shoot still photos while looking at the subject on the EOS Utility screen. Also, the captured image is directly saved on your computer; therefore, you can check it with Digital Photo Professional.
IMPORTANT
You cannot operate the camera when the [Remote Live View window] is displayed. When you press the <  > (Live View Shoot) button, the Live View image will also display on the camera's LCD monitor, allowing you to view the image while operating the camera.
> (Live View Shoot) button, the Live View image will also display on the camera's LCD monitor, allowing you to view the image while operating the camera. 1. Connect your camera and the computer, and then turn the camera's power switch to < ON >.
Please see the Related Information for how to connect the camera to the computer.
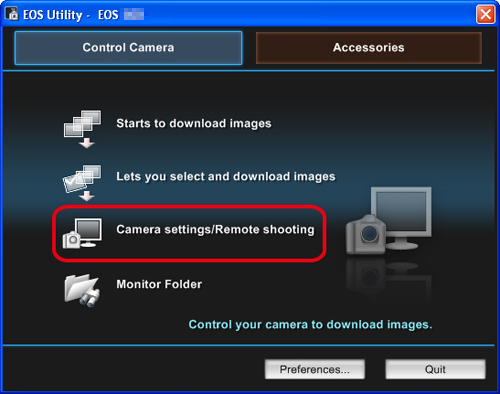
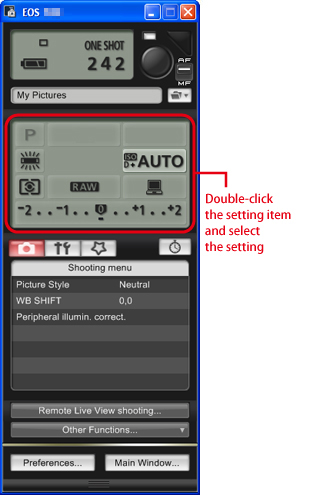
2. Once EOS Utility starts, click [Camera settings/Remote shooting].
3. The capture window appears, so set the settings items for shooting.
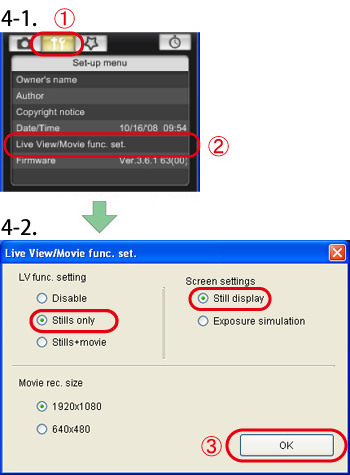
4. Set the Live View function.
4-1. Click  to [display the Function Setting Menu], and then click [Live View/Movie func. set.](
 ).
).
to [display the Function Setting Menu], and then click [Live View/Movie func. set.](). 4-2. The [Live View/Movie func. set.] window appears, so select [Stills only] and [Still display], and then click [OK](  ).
).
). 
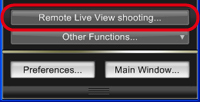
5. Click the [Remote Live View shooting] button.
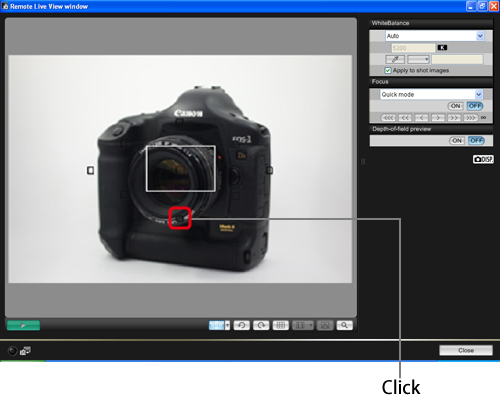
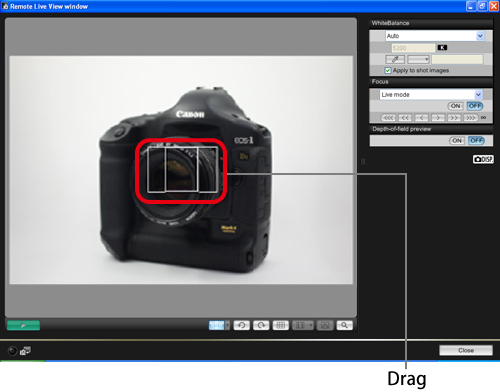
6. The [Remote Live View window] appears, so check the shooting image.
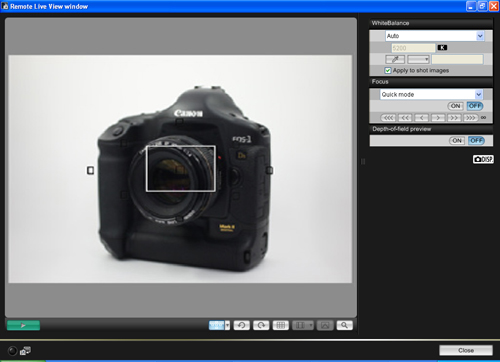
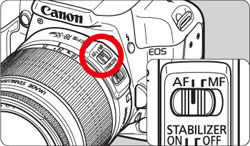
7. If you want to focus using AF (autofocus), set the lens focus mode switch to <AF>.
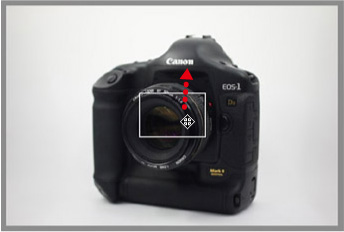
8. Because the mouse cursor will change in shape as follows if it is moved to the inside of the rectangular frame on the screen, drag the enlargement display frame to move it to the position where you want to focus.
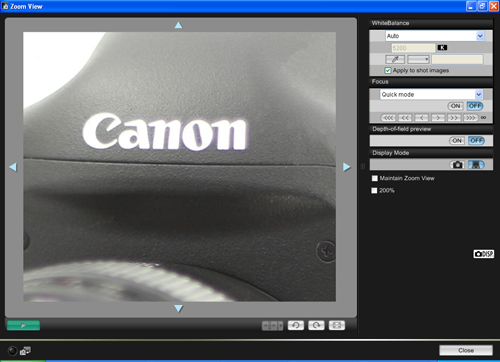
9. Click [  ] in the lower center of the window to display the enlarged image.
] in the lower center of the window to display the enlarged image. The section you selected in step 8 is displayed enlarged at 100% (actual pixel size)
To move the display position in the [Zoom View] window, click either [  ], [
], [  ], [
], [  ], or [
  ].
].
], [ ], [ ], or [ ]. Double-click an image in the [Zoom View] window to return to the [Remote Live View window].
10. Click the [Focus] buttons to bring the image into focus.
The [Remote Live View window] changes in real time according to the focus position adjustment.
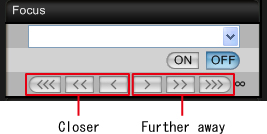
Focusing Adjustment Amount
-
 ,
,  : Adjustment amount: Large
 -
 ,
,  : Adjustment amount: Medium
 -
 ,
,  : Adjustment amount: Small
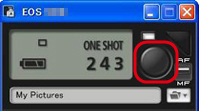
11. When focus is achieved and the camera is ready for shooting, click the camera release button to shoot.
The captured images are transferred to the computer, Digital Photo Professional starts automatically, and the captured images are displayed.

In Quick, Live and Live face detection AF modes, images can be focused automatically in the same way as with the camera itself.
To focus automatically, follow steps 1 to 9 of "Remote Live View Shooting (Focusing Manually)", and set each AF mode.
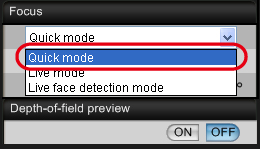
Focusing Using Quick Mode
10. Select [Quick mode] from the [Focus] list box.
The AF points appear.
11. Click the AF point in the position where you want to focus.
- You can switch between automatic AF point selection and manual AF point selection by clicking the [
 ] in the [
  ].
]. - In automatic selection, all the AF points are automatically selected.
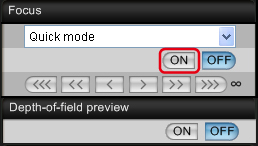
12. Click [ON].
- AF is executed.
- When focus is achieved, the camera makes a beeping sound, image will reappear in the Remote Live View window and the AF point turns red.
- To cancel AF operation, click [OFF].
13. When focus is achieved and the camera is ready for shooting, click the camera release button to shoot.
The captured images are transferred to the computer, Digital Photo Professional starts automatically, and the captured images are displayed.

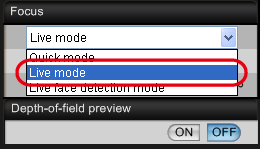
Focusing Using Live Mode
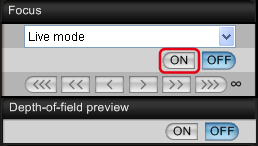
10. Select [Live mode] from the [Focus] list box.
The AF points appear.
11. Drag the enlargement display frame to move it to the position where you want to focus.
12. Click the [ON] button.
- AF is executed.
- When focus is achieved, the camera makes a beeping sound and the AF point turns green.
- If focus is not achieved, the AF point will turn red.
13. When focus is achieved and it becomes ready for shooting, click the camera release button to shoot.
The captured images are transferred to the computer, Digital Photo Professional starts automatically, and the captured images are displayed.
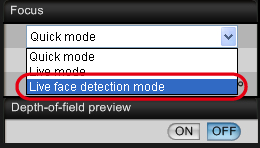
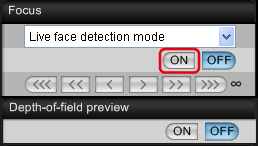
Focusing Using Live Face Detection Mode
10. Select [Live face detection mode] from the [Focus] list box.
- When a face is detected, an AF point appears.
- When there is a face other than the face detected by the camera, a new AF point appears when you move the cursor to the position of the other face. Clicking that position selects the AF point.
11. Click the [ON] button.
- AF is executed.
- When focus is achieved, the camera makes a beeping sound and the AF point turns green.
- If focus is not achieved, the AF point will turn red.
- If a face cannot be detected, the AF point will be fixed to the center for focusing.
12. When focus is achieved and it becomes ready for shooting, click the camera release button to shoot.
The captured images are transferred to the computer, Digital Photo Professional starts automatically, and the captured images are displayed.

NOTE
Images shot in Live View Mode can be recorded both on a PC and a memory card.
To perform this setting, click [Preferences] in the main window of EOS Utility to display the [Preferences] dialog box, click the <Remote Shooting> tab, and then in the window that appears, select the [Save also on the camera's memory card] checkbox.
Explanations for the Remote Live View operation method are complete.