Where to Check for Paper Jams (MF6550)
30-Jan-2012
8201419600
Solution
When a jam occurs in the machine, the paper jam message appears on the LCD display. Check the jam location indicator where the jam occurs, then remove the jammed paper.
NOTE
Do not force a jammed document or paper out of the machine.
 Document Jams
When [FEEDER PAPER JAM/CHECK THE FEEDER], [CHECK DOCUMENT] or [DOCUMENT TOO LONG] appears on the LCD display, remove a jammed document from the ADF or the document delivery slot.
CAUTION
a. When removing jammed documents or paper, take care not to cut your hands on the edges of the document or paper.
b. When removing jammed paper or when inspecting the inside of the machine, do not allow necklaces, bracelets or other metal objects to touch the inside of the machine as this may result in burns or electrical shock.
1. Open the ADF cover.
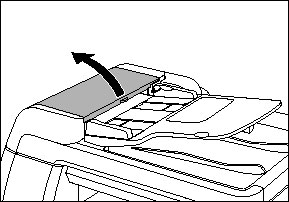
2. Remove any jammed documents.

NOTE
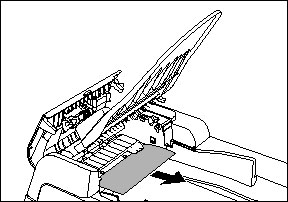
Do not pull the document forcefully as it may tear.
3. Lift the document feeder tray.
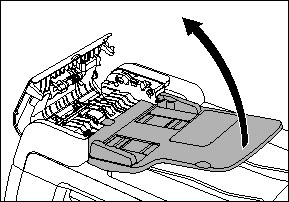
4. Remove any jammed documents.
5. Lower the document feeder tray and close the ADF cover.
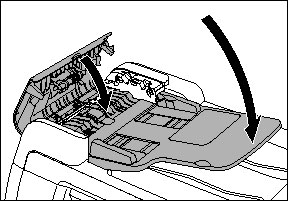
CAUTION
Be careful not to get your fingers caught.
6. Open the platen glass cover and remove any jammed documents.
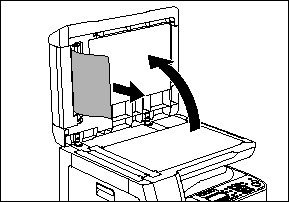
7. Close the platen glass cover.

CAUTION
Be careful not to get your fingers caught.
 Paper Jams
When [PAPER JAM] appears on the LCD display, remove jammed paper from inside the machine first, then from the paper cassette if necessary. Check the following if you experience repeated paper jams:
- Even the edge of the paper stack by a flat surface before loading it in the machine.
- Check that the paper you are using meets the requirements for use.
- Make sure you have removed any scraps of paper from inside the machine.
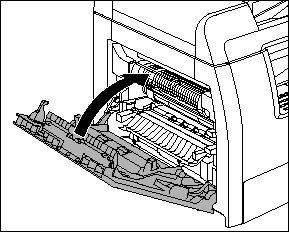
1. Open the left cover.

2. Carefully pull the jammed paper out of the machine.
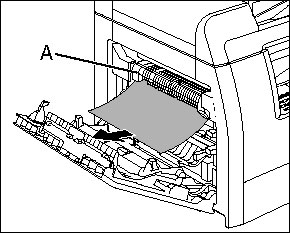
(A): The fixing assembly
CAUTION
a. Do not touch the fixing assembly (A) as it becomes very hot during use.
b. If you tear the paper, remove any torn pieces to avoid further jams.
c. If loose toner comes into contact with your skin or clothing, wash with cold water. Warm water will set the toner.
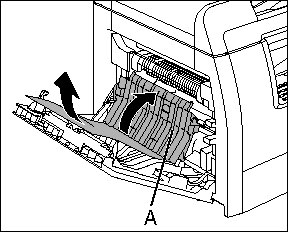
3.Tilt the 2-sided transport guide (A) toward the machine, then remove the jammed paper (Only for 2-sided copying).
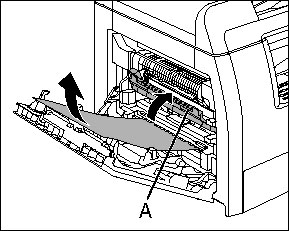
4. Lift and hold the transcription frame (A) then remove the jammed paper (Only for 2-sided copying).
5. Close the left cover.
CAUTION
Be careful not to get your fingers caught.
6. If you use the optional paper cassette, open the cover on the left side of the optional paper cassette. Remove any jammed paper then close the cover.

7. Pull out the paper cassette and push the corners of the stack under the tabs.
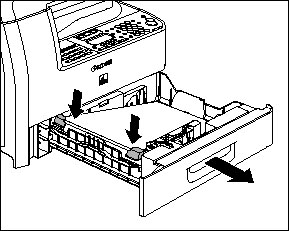
8. Gently push the paper cassette back into the machine until it clicks.

CAUTION
Be careful not to get your fingers caught.