Printing directly from the camera (Camera-direct prints)
25-Aug-2010
8200895800
Solution
Connect the camera to the printer and print directly from the camera.
CAUTION
These instructions show how to print one image on one sheet of paper as an example.
1. Connect the camera to the printer.
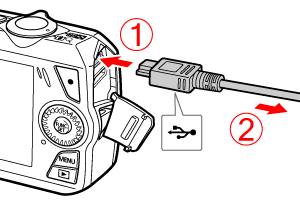
 Connect the [interface cable] to the camera's [A/V OUT / DIGITAL terminal].
 Connect the other end of the cable to printer's USB terminal.
2. Turn the printer's power on.
3. Press the <Playback> ( ) button to turn on the camera.
 ) button to turn on the camera.
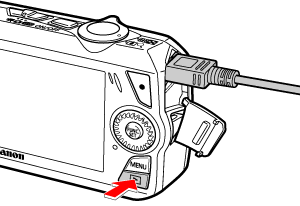
4. Operate the <directional buttons> left or right to display an image to print on the LCD monitor.
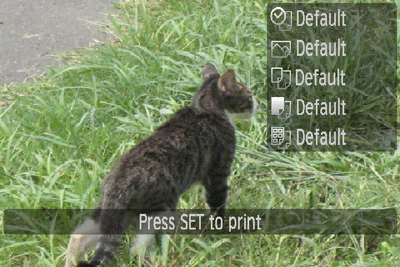
Press the camera's <FUNC./SET> ( ) button.
 ) button.
5. The following screen appears.
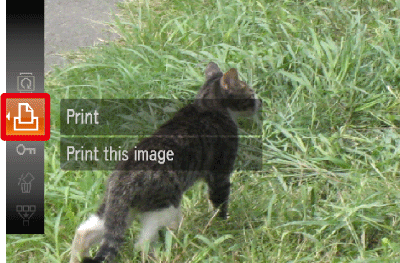
Make sure that the [Print] ( ) is selected, and then press the camera's <FUNC./SET> (
 ) button.
 ) is selected, and then press the camera's <FUNC./SET> (
 ) button.
6. The screen for specifying the print settings appears.
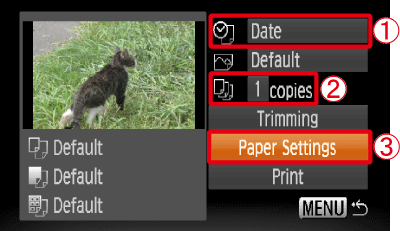
Operate the <directional buttons> left or right to select  [Date] for adding the date.
 [Date] for adding the date.
Operate the <directional buttons> left or right to specify  the number of prints.
 the number of prints.
Select  [Paper Settings], and then press the camera's <FUNC./SET> (
 ) button.
 [Paper Settings], and then press the camera's <FUNC./SET> (
 ) button.
7. The screen for setting the paper size appears.
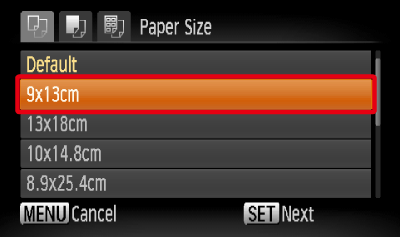
Operate the <directional buttons> up or down to select the paper size, then press the camera's <FUNC./SET> ( ) button. In the image shown above, the [9 x 13 cm] size is selected.
 ) button. In the image shown above, the [9 x 13 cm] size is selected.
8. The screen for setting the paper type appears.
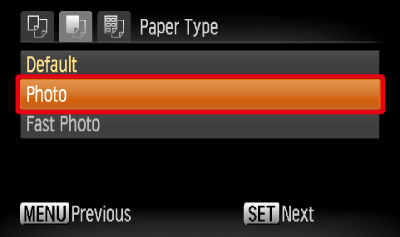
Operate the <directional buttons> up or down to select the paper type, and then press the camera's <FUNC./SET> ( ) button. In the image shown above, [Photo] is selected.
 ) button. In the image shown above, [Photo] is selected.
9. The layout (border) settings screen appears.
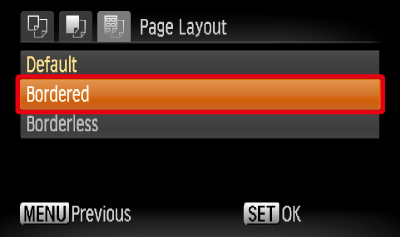
Operate the <directional buttons> up or down to select the layout type, and then press the camera's <FUNC./SET> ( ) button. In the image shown above, [Bordered] is selected.
 ) button. In the image shown above, [Bordered] is selected.
10. Return to the print setting screen.
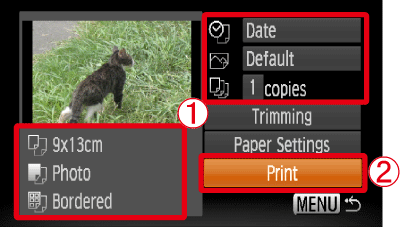
 Make sure that the settings are correct.
Select  [Print] and press the camera's <FUNC./SET> (
 ) button to start printing.
 [Print] and press the camera's <FUNC./SET> (
 ) button to start printing.