Scanning Images Larger than the Platen (Stitch Assist)
26-Dec-2007
8100044900
Solution
Stitch Assist allows you to scan the left and right halves of a large document separately and combine the scanned images back into one image. You can scan documents that are up to twice as large as the platen.
Windows
On the Windows desktop, double-click  [MP Navigator EX 1.0].
 [MP Navigator EX 1.0].
Alternatively, on the Windows taskbar, click [Start], point to [(All) Programs], [Canon Utilities], then [MP Navigator EX 1.0]. Then click [MP Navigator EX 1.0].
The MP Navigator EX one-click mode screen or navigation mode screen opens.
Macintosh
Open [Applications]-[Canon Utilities] folder in the hard disk that you installed MP Navigator EX, and double-click  [MP Navigator EX 1.0] icon.
 [MP Navigator EX 1.0] icon.
The MP Navigator EX one-click mode screen or navigation mode screen opens.
One-click Mode Screen

You can complete from scanning to saving, etc. at one time by simply clicking the corresponding icon on the one-click mode screen. Stitch Assist is available from the one-click mode screen as well, by changing the document size.
Navigation Mode Screen

When the one-click mode screen has opened, click the  (Switch Mode) button to switch to the navigation mode screen.
 (Switch Mode) button to switch to the navigation mode screen.
 REFERENCE
- If the [Show this window at startup] checkbox is not selected, the last used screen opens.


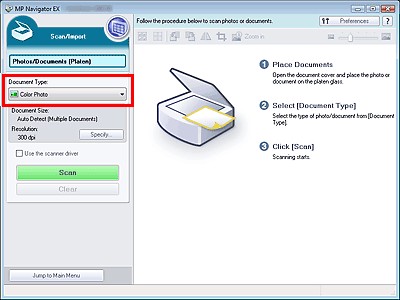
The [Scan Settings] Dialog Box opens.
Select Stitch-assist under [Document Size], then specify the scanning resolution as required.

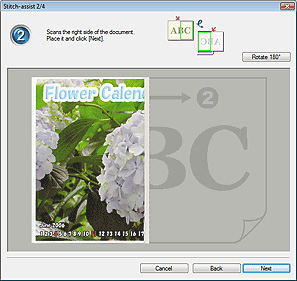
The [Stitch-assist] dialog box opens.


The right half of the document is scanned.

REFERENCE
- When the document is scanned upside down, the image displayed in the [Stitch-assist] dialog box will also be upside down. Click [Rotate 180°] to rotate the image to the correct orientation.

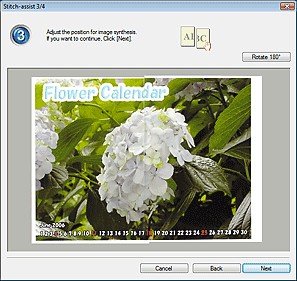
The combined image appears in the Thumbnail List area.
When scanning is completed, the [Scan Complete] dialog box opens. Select [Scan] or [Exit]. Select [Scan] to scan the next document, or select [Exit] to end.

When Save is selected:
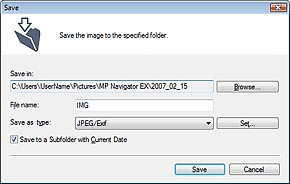
The [Save] dialog box opens. Specify the destination folder, file name and file type.

IMPORTANT
- You cannot select [JPEG/Exif] when [Document Type] is [Text(OCR)].
REFERENCE
- The default folder is [MP Navigator EX] in the [Pictures] folder (Windows Vista) or in the [My Pictures] folder (Windows XP and Windows 2000). The default folder is [MP Navigator EX] in the [Pictures] folder (Macintosh).
When Save as PDF file is selected:
The [Save as PDF file] dialog box opens. Specify the file type, file name and destination folder.

Select from the following PDF file types:
| When multiple images are selected, each image is saved as a separate PDF file. | |
| PDF (Multiple Pages) | Multiple images are saved in one PDF file. |
| PDF (Add Page) | Selected images are added to a specified PDF file. The images are added to the end of the PDF file. You cannot rearrange pages of the PDF file to which images are added. |
IMPORTANT
- You can select only PDF files created with MP Navigator EX, MP Navigator or CanoScan Toolbox. You cannot select PDF files created with other applications. PDF files edited in other applications cannot be selected as well.
- [PDF(Multiple Pages)] is displayed when multiple images are selected.
REFERENCE
- The default folder is [MP Navigator EX] in the [Pictures] folder (Windows Vista) or in the [My Pictures] folder (Windows XP and Windows 2000). The default folder is [MP Navigator EX] in the [Pictures] folder (Macintosh).
Scanned images are saved according to the settings.
To further use/edit the scanned images on MP Navigator EX, click [Open saved location] in the [Save Complete] dialog box. The saved images appear in the [View & Use] screen.